
النتائج 201 إلى 210 من 452
-
LinkBack
 LinkBack URL
 About LinkBacks
- Bookmark & Share
- Tweet this thread
-

رقم العضوية : 58100
تاريخ التسجيل : 06Jan2010
المشاركات : 5,727
النوع : ذكر
الاقامة : السعوديه
السيارة: not yet
السيارة[2]: ..
دراجة بخارية: no
الحالة :

 -
hasad">
-
hasad">
This image has been resized. Click this bar to view the full image.
This image has been resized. Click this bar to view the full image.
This image has been resized. Click this bar to view the full image.
This image has been resized. Click this bar to view the full image.
This image has been resized. Click this bar to view the full image.
This image has been resized. Click this bar to view the full image.
This image has been resized. Click this bar to view the full image.
-
رقم العضوية : 58100
تاريخ التسجيل : 06Jan2010
المشاركات : 5,727
النوع : ذكر
الاقامة : السعوديه
السيارة: not yet
السيارة[2]: ..
دراجة بخارية: no
الحالة :
-
-
رقم العضوية : 58100
تاريخ التسجيل : 06Jan2010
المشاركات : 5,727
النوع : ذكر
الاقامة : السعوديه
السيارة: not yet
السيارة[2]: ..
دراجة بخارية: no
الحالة :
-
This image has been resized. Click this bar to view the full image.
The view in my garage of the lip spoiler!
PS: Don't mind the bad guys taped to the wall. They all took multiple head shots at 30 yards with 5.56 green tips.
This image has been resized. Click this bar to view the full image.
Same position, lower angle.
PS: There are those head shot victims again... ;-)
Click this bar to view the full image.
View from Above... looks awesome.
This image has been resized. Click this bar to view the full image.
Can anyone translate this for me? :-p
Click this bar to view the full image.
-
رقم العضوية : 58100
تاريخ التسجيل : 06Jan2010
المشاركات : 5,727
النوع : ذكر
الاقامة : السعوديه
السيارة: not yet
السيارة[2]: ..
دراجة بخارية: no
الحالة :
-

-
رقم العضوية : 58100
تاريخ التسجيل : 06Jan2010
المشاركات : 5,727
النوع : ذكر
الاقامة : السعوديه
السيارة: not yet
السيارة[2]: ..
دراجة بخارية: no
الحالة :
-

This image has been resized. Click this bar to view the full image.
-
رقم العضوية : 58100
تاريخ التسجيل : 06Jan2010
المشاركات : 5,727
النوع : ذكر
الاقامة : السعوديه
السيارة: not yet
السيارة[2]: ..
دراجة بخارية: no
الحالة :
-

This image has been resized. Click this bar to view the full image.
-
رقم العضوية : 58100
تاريخ التسجيل : 06Jan2010
المشاركات : 5,727
النوع : ذكر
الاقامة : السعوديه
السيارة: not yet
السيارة[2]: ..
دراجة بخارية: no
الحالة :
-


-
رقم العضوية : 58100
تاريخ التسجيل : 06Jan2010
المشاركات : 5,727
النوع : ذكر
الاقامة : السعوديه
السيارة: not yet
السيارة[2]: ..
دراجة بخارية: no
الحالة :
-
This image has been resized. Click this bar to view the full image.
This image has been resized. Click this bar to view the full image.
This image has been resized. Click this bar to view the full image.
This image has been resized. Click this bar to view the full image.

-
رقم العضوية : 58100
تاريخ التسجيل : 06Jan2010
المشاركات : 5,727
النوع : ذكر
الاقامة : السعوديه
السيارة: not yet
السيارة[2]: ..
دراجة بخارية: no
الحالة :
-
This image has been resized. Click this bar to view the full image.
This image has been resized. Click this bar to view the full image.
This image has been resized. Click this bar to view the full image.
This image has been resized. Click this bar to view the full image.
-
رقم العضوية : 58100
تاريخ التسجيل : 06Jan2010
المشاركات : 5,727
النوع : ذكر
الاقامة : السعوديه
السيارة: not yet
السيارة[2]: ..
دراجة بخارية: no
الحالة :
-
hasad">
This image has been resized. Click this bar to view the full image.
R side skirt
Here I was setting up for the side skirts.
I precut some painters tape to help hold on the part to the rocker to define its position.
Tip: use the foam sheet and place it below the car incase the part at the opposite end slips and falls to the ground. It’ll prevent any touch-ups.
This image has been resized. Click this bar to view the full image.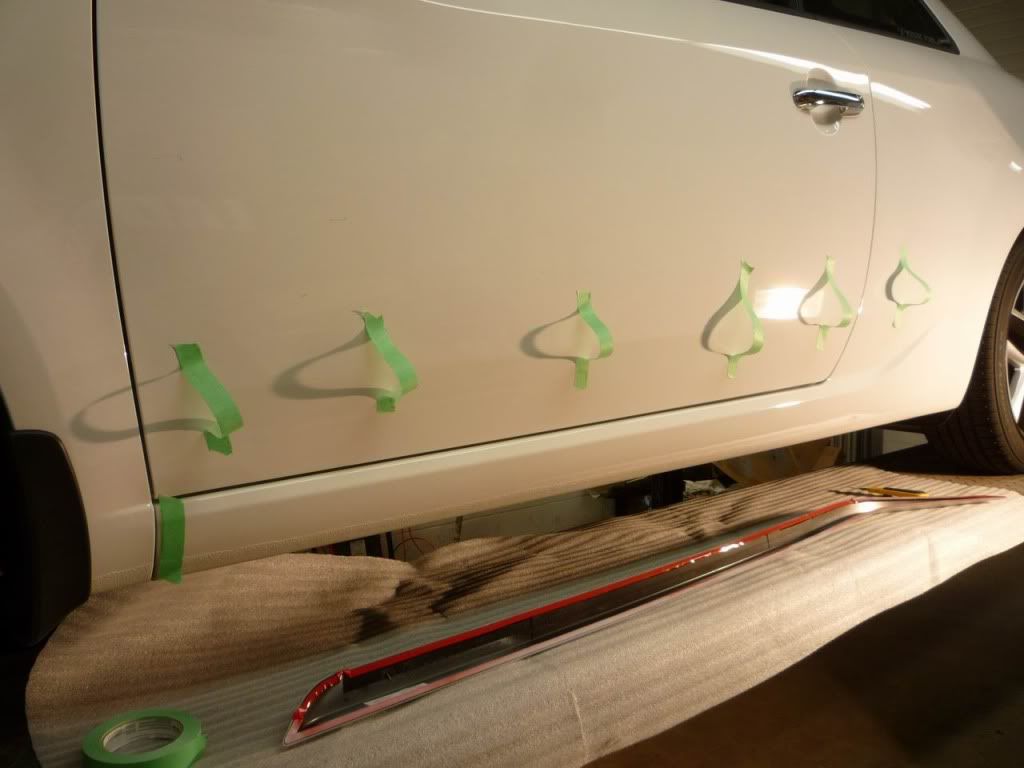
The 1” side tape is perfect to defining the position of the front edge
This image has been resized. Click this bar to view the full image.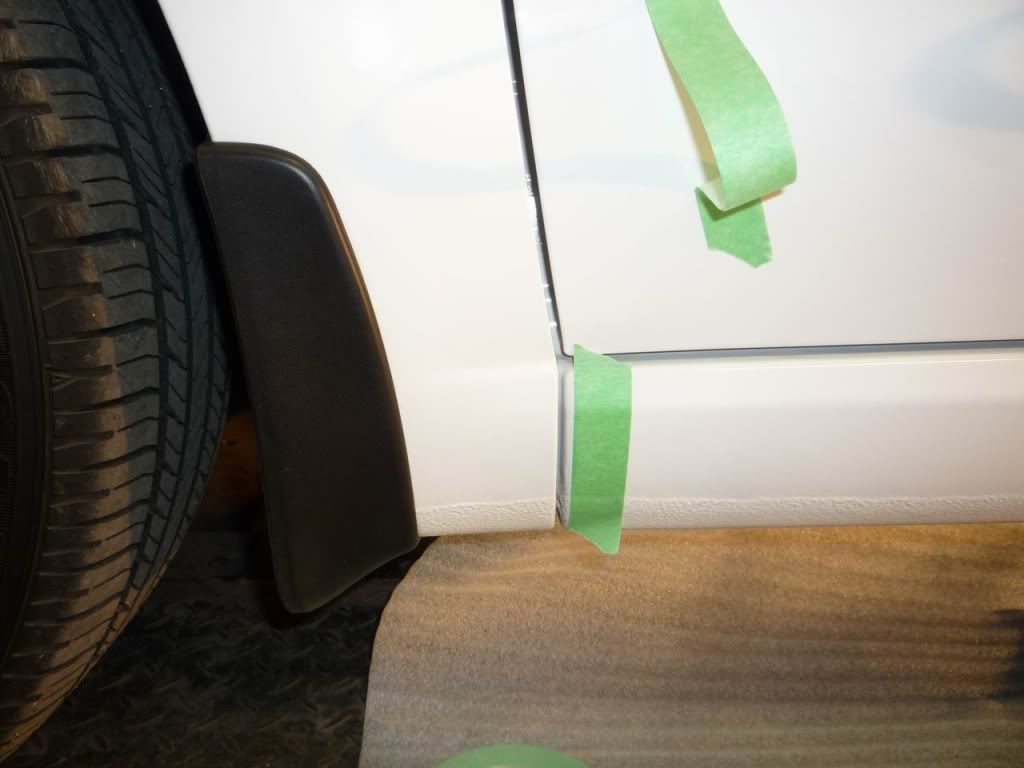
Side skirt installation complete
This image has been resized. Click this bar to view the full image.
This image has been resized. Click this bar to view the full image.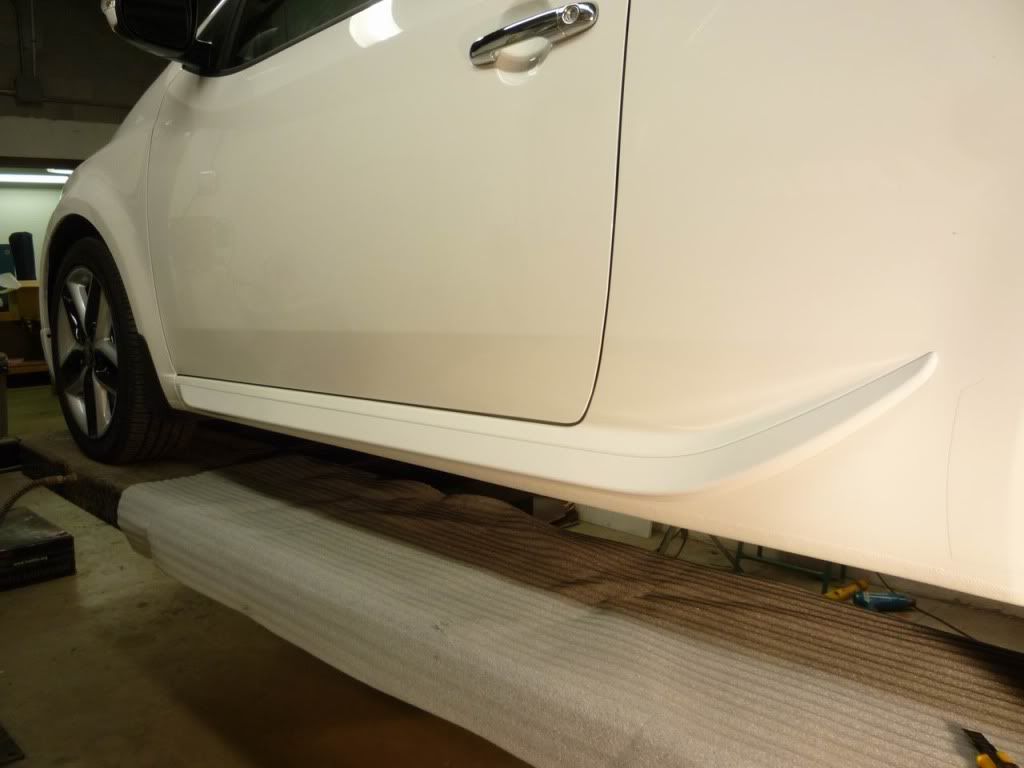
This image has been resized. Click this bar to view the full image.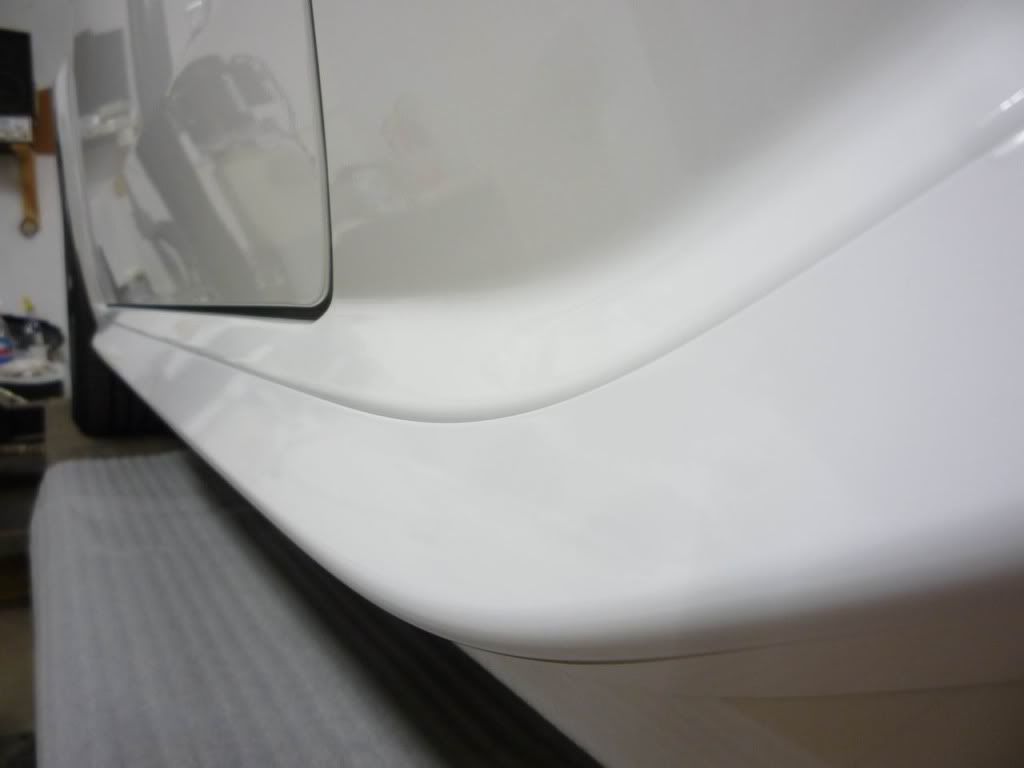
R rear lip style spoiler
Here’s the spoiler after painting
This image has been resized. Click this bar to view the full image.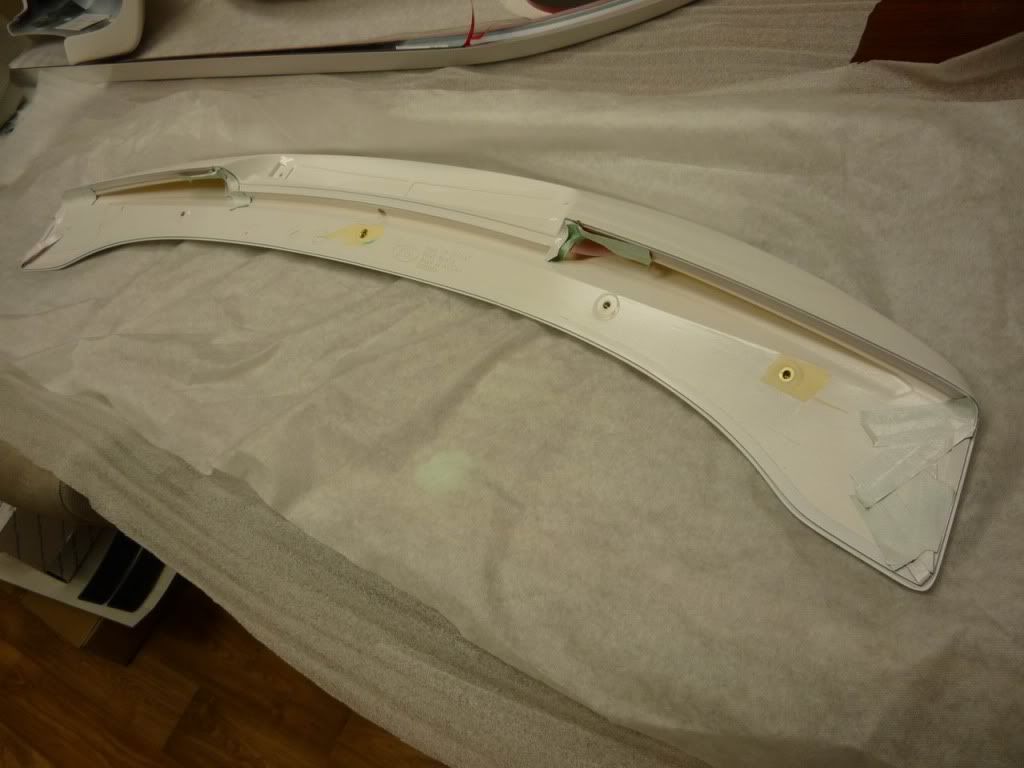
The black strips on stuck on the deck lid are called drill guides. They have a stem which slips into the 5 mounting positions of the spoiler and help transfer those locations onto the deck lid. The green painters tape was used to provide me with the center position I found when I first placed the spoiler on the deck lid.
This image has been resized. Click this bar to view the full image.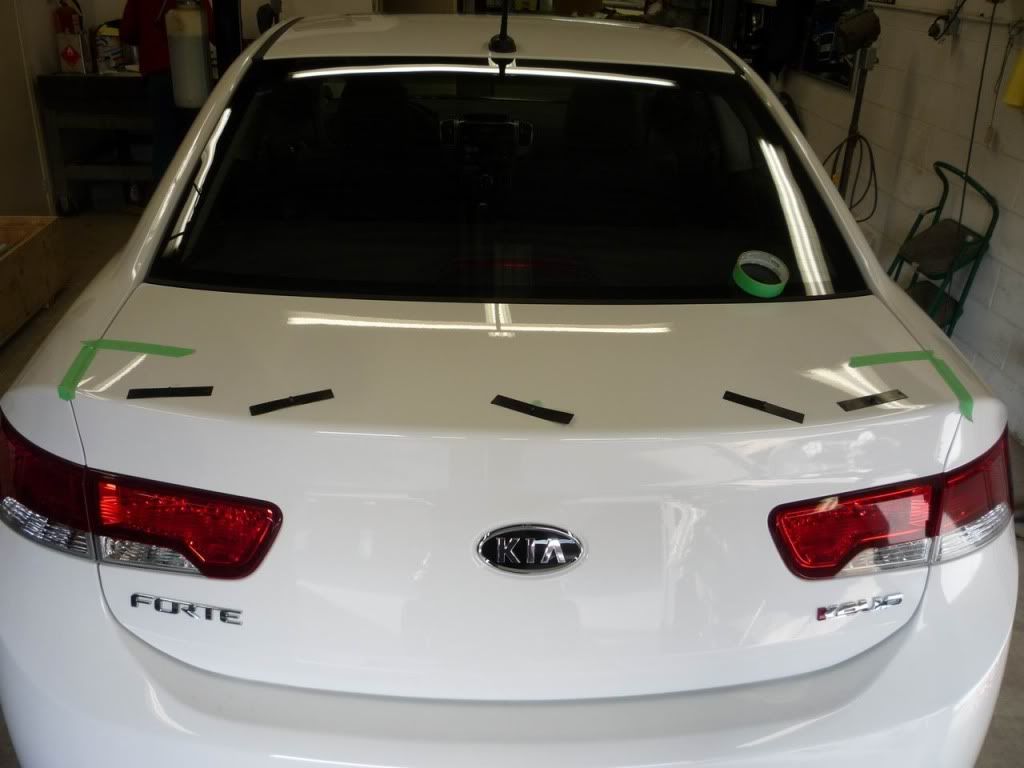
I mounted the brake light to the spoiler. NOTE: the R spoilers will include a Hella brake light with a RED lens. I used a Hella light with a clear lens (lights up red) from an old project which I wanted to try out.
This image has been resized. Click this bar to view the full image.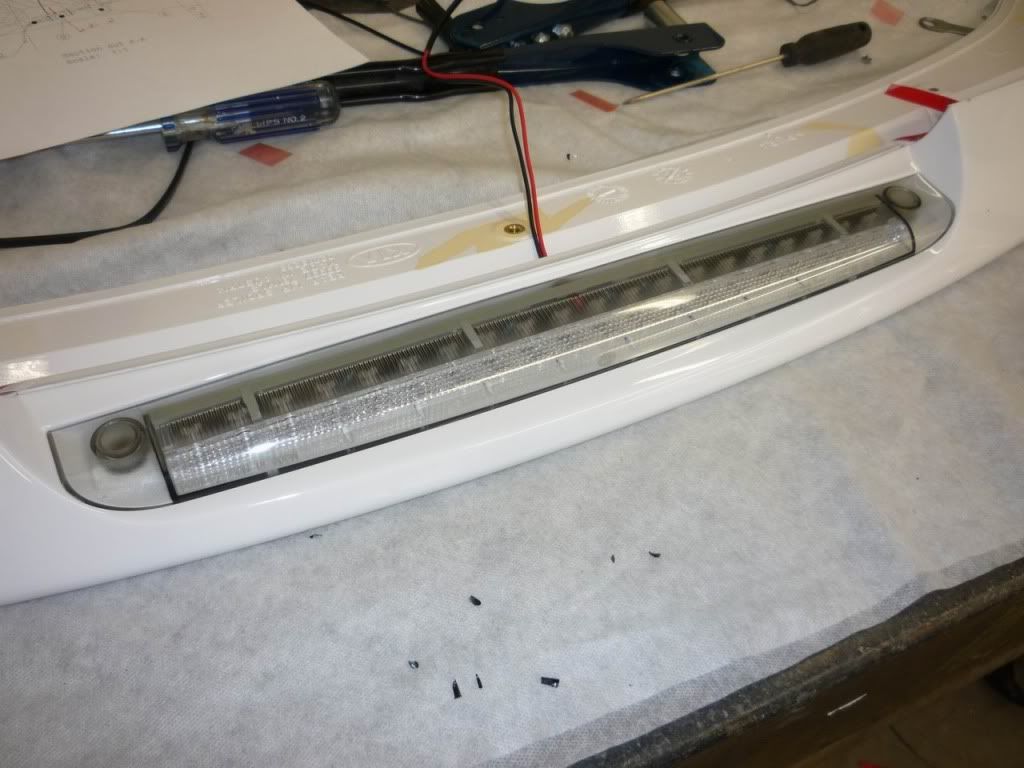
These show the connection to the center stop light located below the rear parcel ....f. We also included some foam pads to wrap the wires in a couple of location to avoid any potential damage.
This image has been resized. Click this bar to view the full image.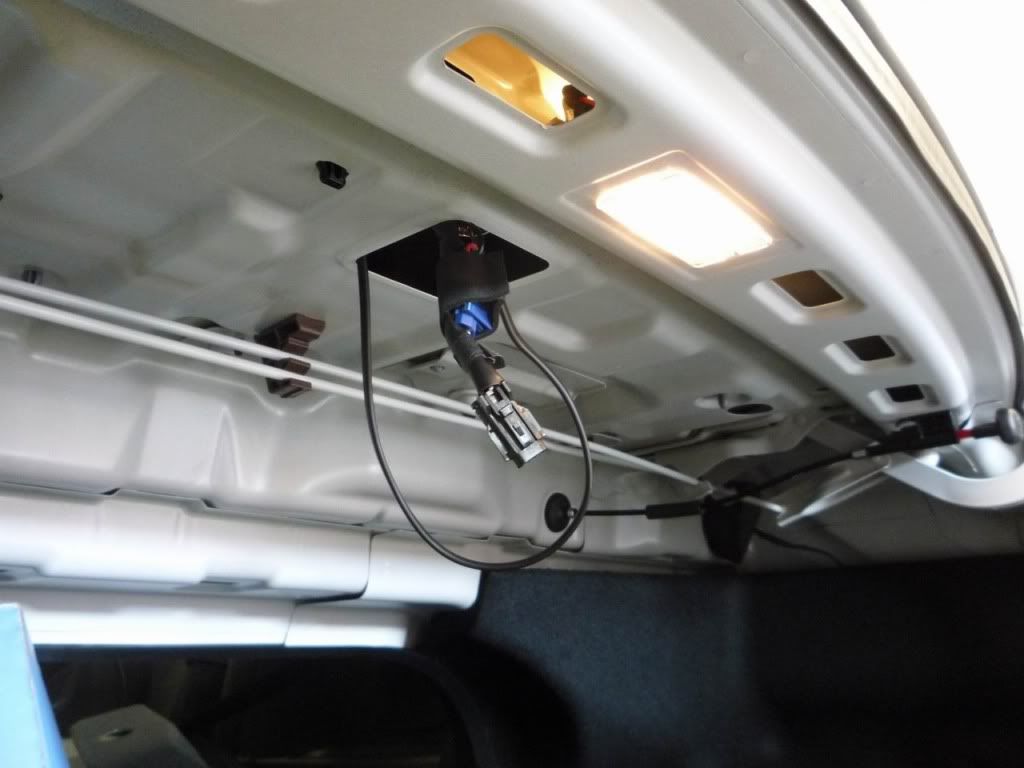
This image has been resized. Click this bar to view the full image.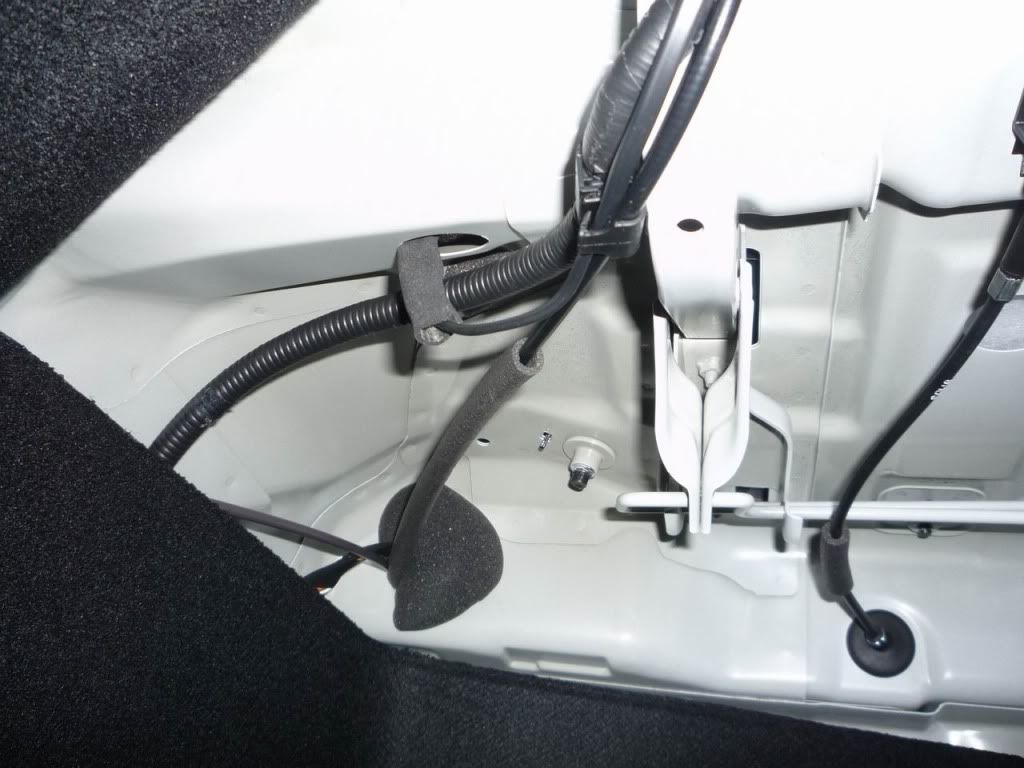
Rear spoiler installation complete
This image has been resized. Click this bar to view the full image.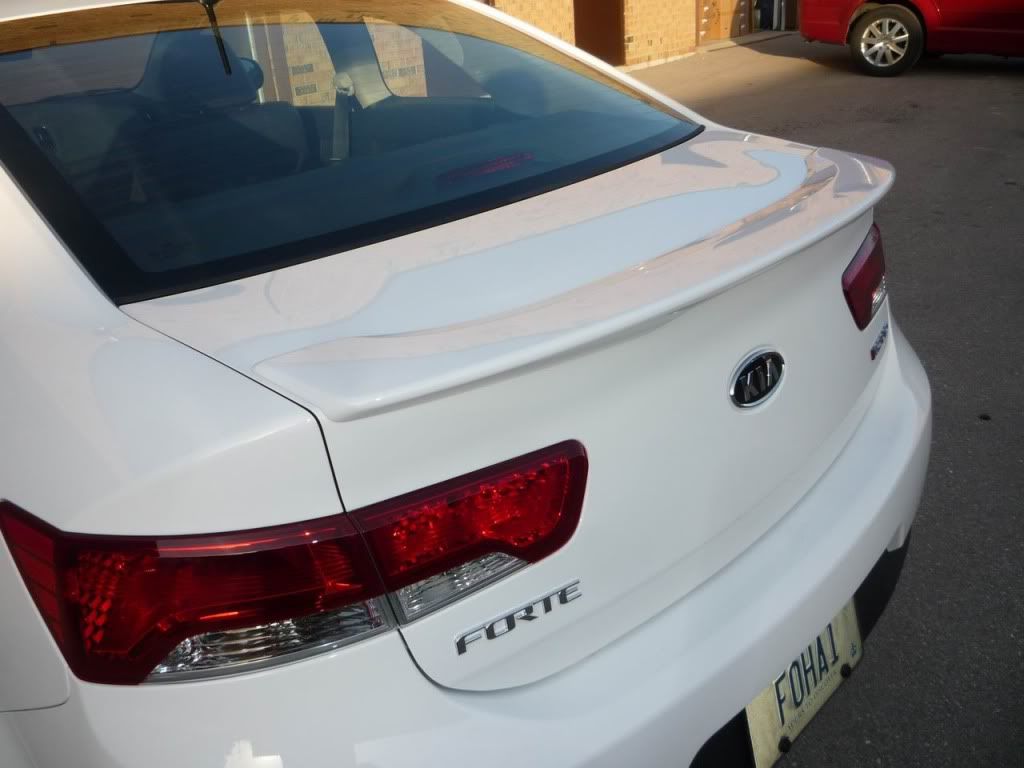
This image has been resized. Click this bar to view the full image.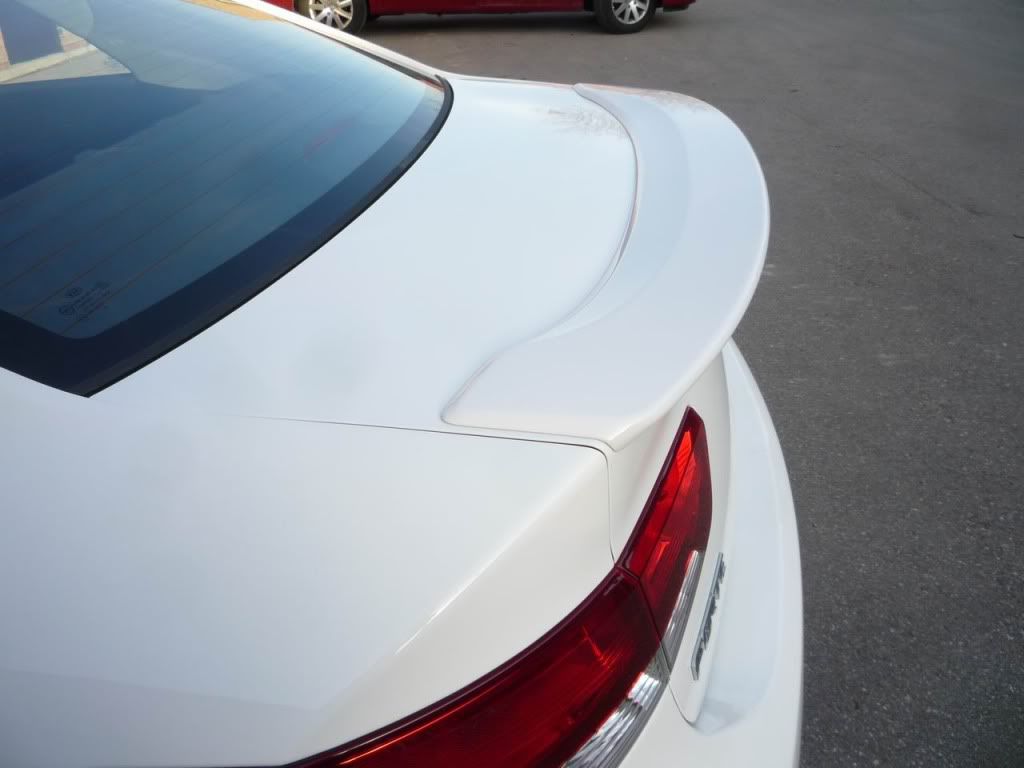
This image has been resized. Click this bar to view the full image.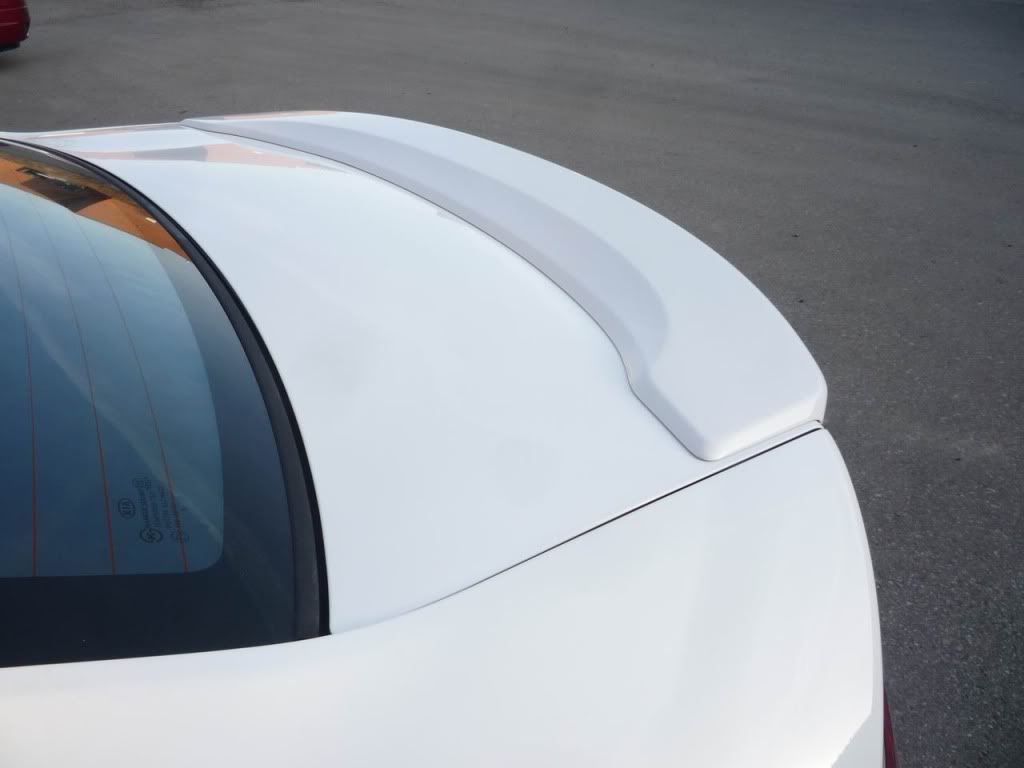
This image has been resized. Click this bar to view the full image.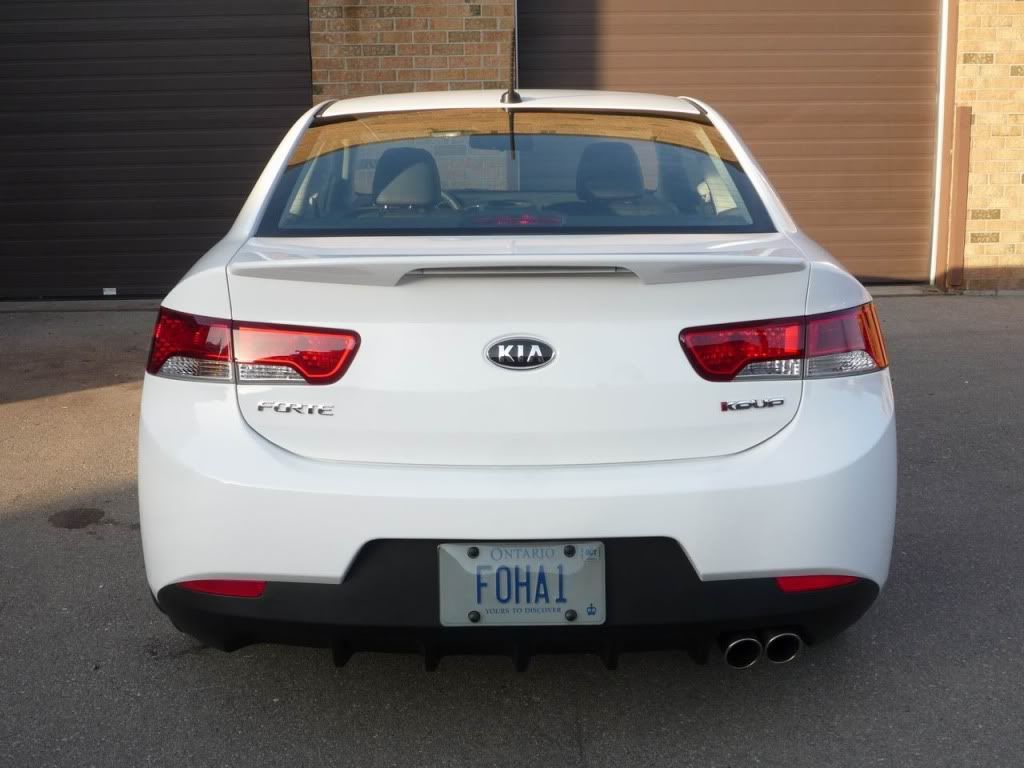
Here’s a side view but I didn’t have the side skirts installed yet.
This image has been resized. Click this bar to view the full image.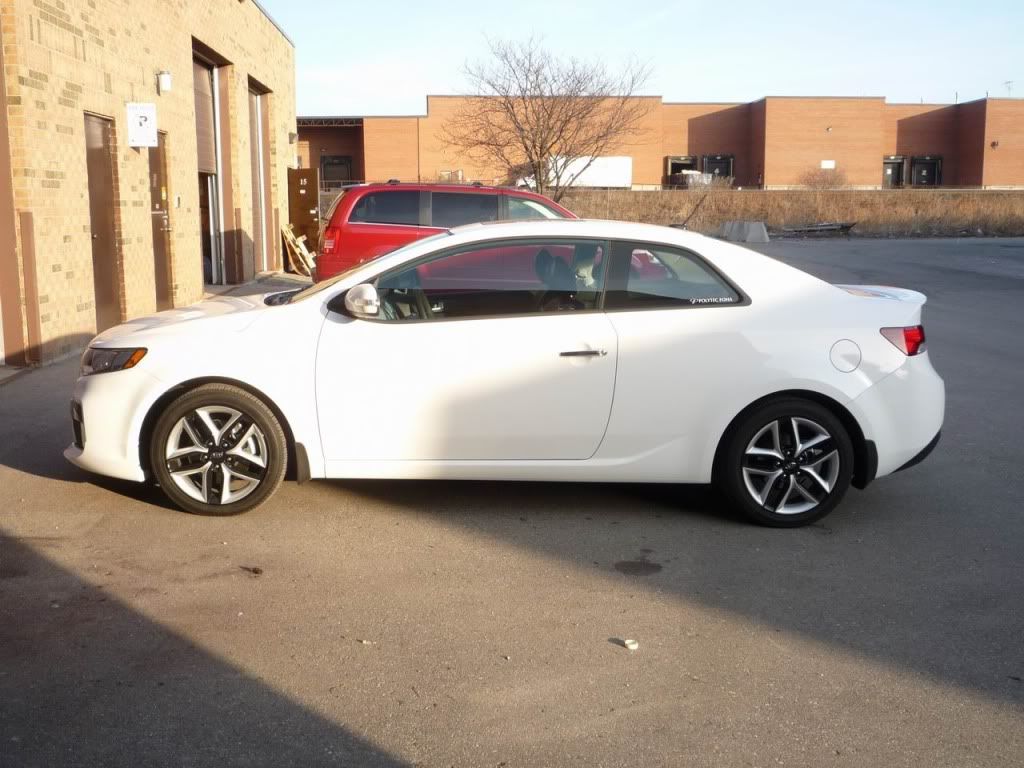
R door sill plates
I used a couple of strips of tape on either side of the original black door sill plate so I know where to place the new R sill plate.
I removed the original black plastic door sill plate using a plastic clip removal tool.
Tip: along the edge, I placed a rag underneath the tool to avoid scuffing the painted surface.
This image has been resized. Click this bar to view the full image.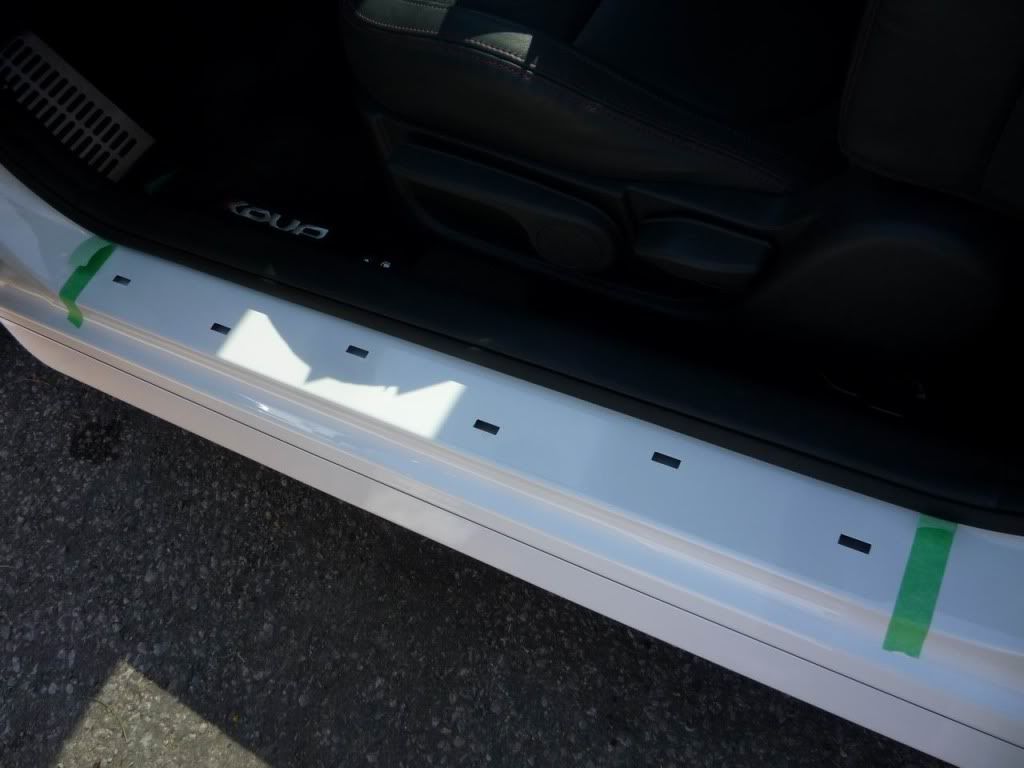
This image has been resized. Click this bar to view the full image.
Door sill installation complete
This image has been resized. Click this bar to view the full image.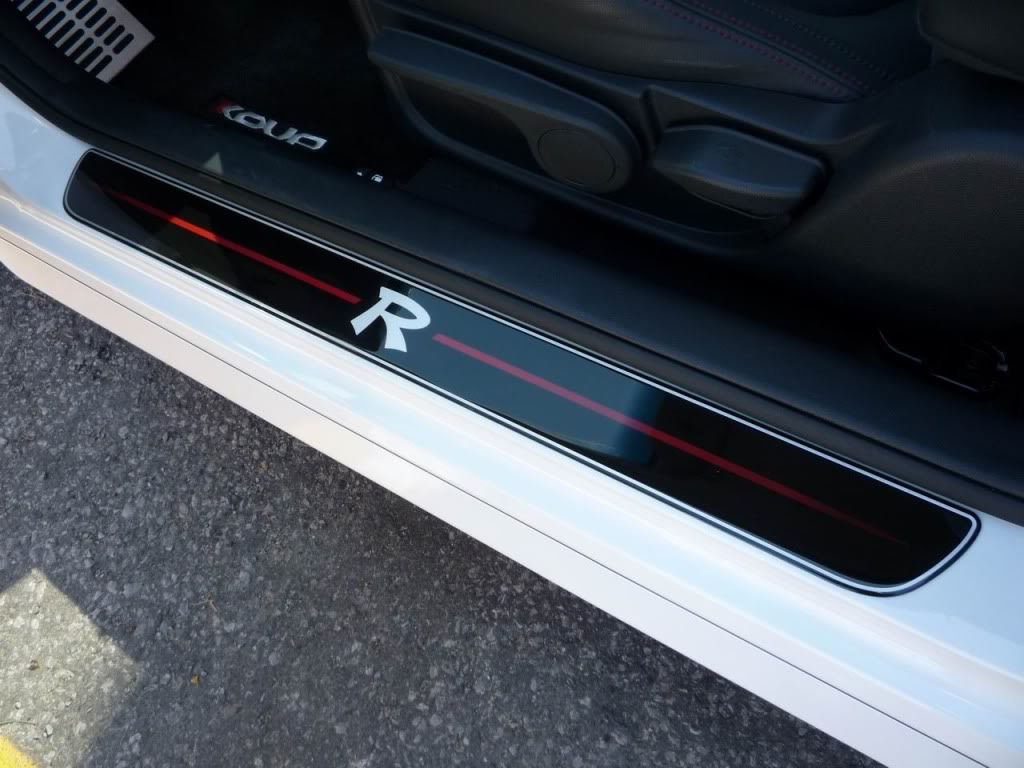
R Badge
I cut the template and held it up to the fender to understand where I need to prep.
I then proceeded to clean the surface and taped the template in place. The template can then be used on the opposite side of the vehicle by simply flipping the template around.
This image has been resized. Click this bar to view the full image.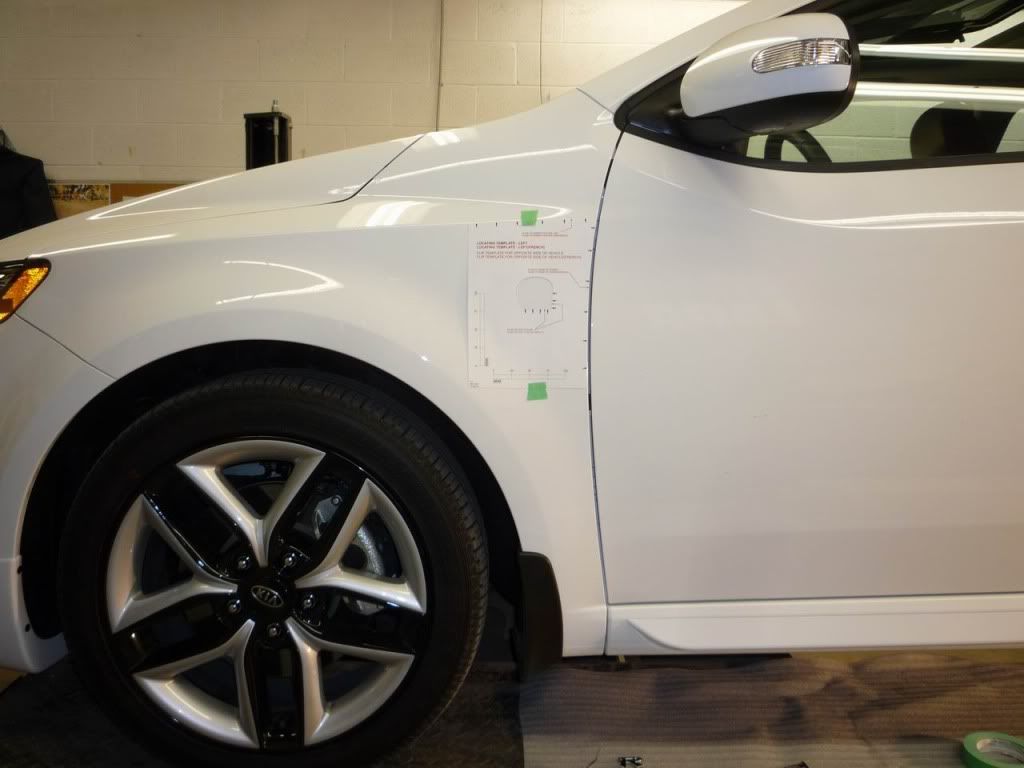
This image has been resized. Click this bar to view the full image.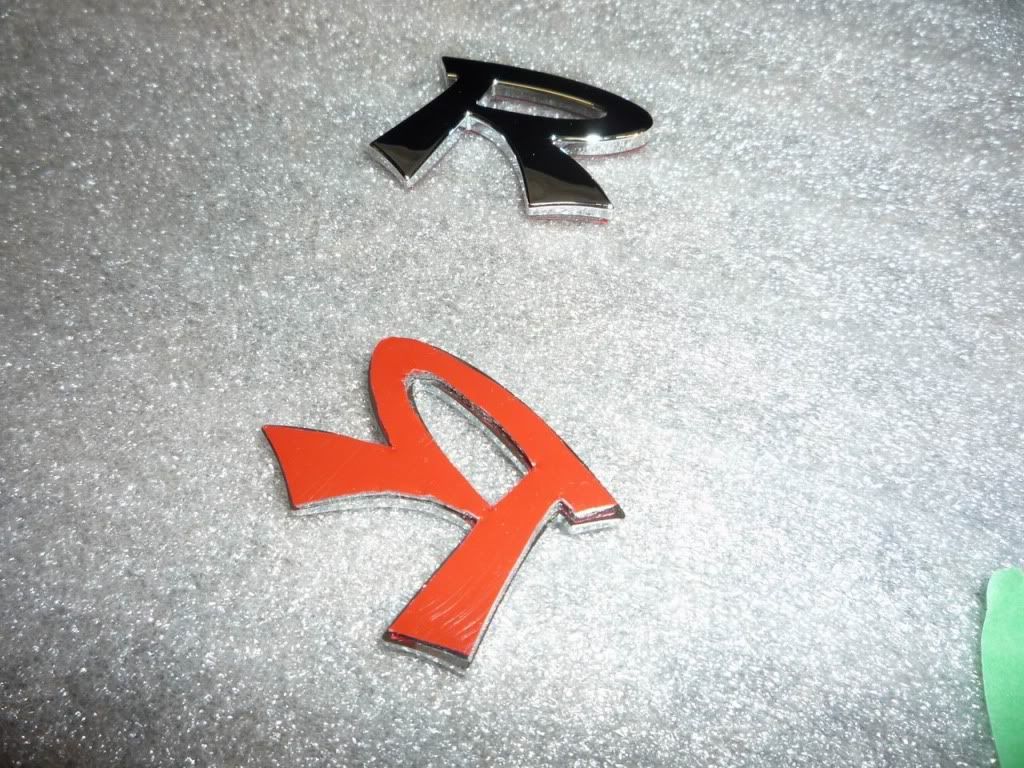
This image has been resized. Click this bar to view the full image.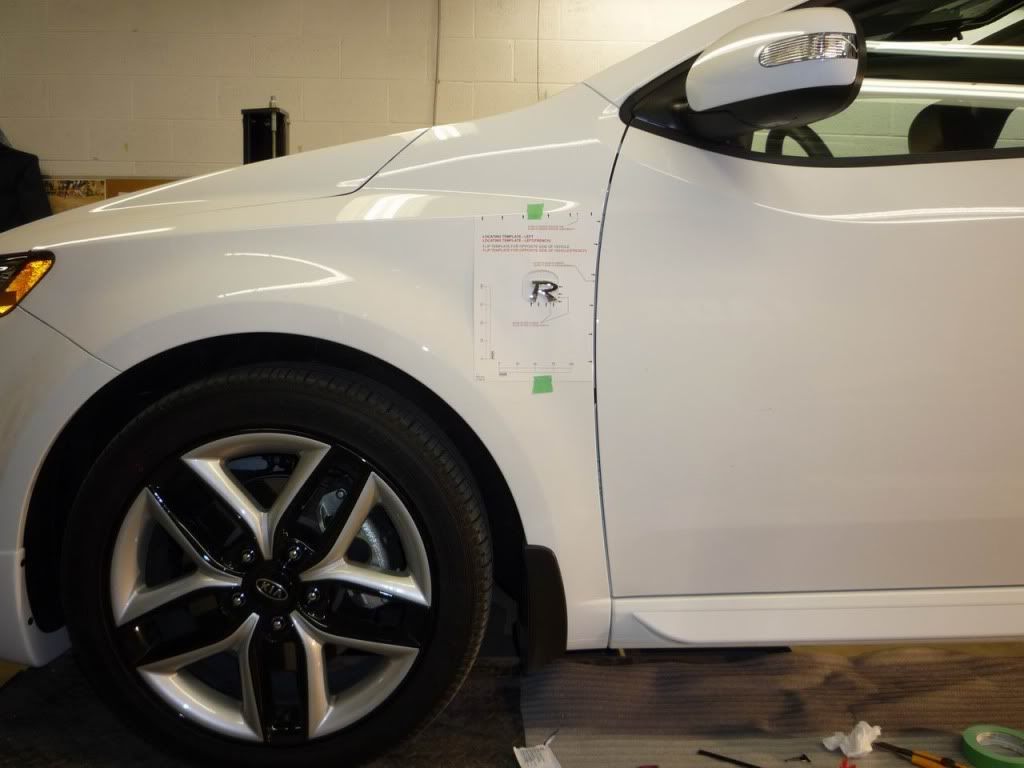
This image has been resized. Click this bar to view the full image.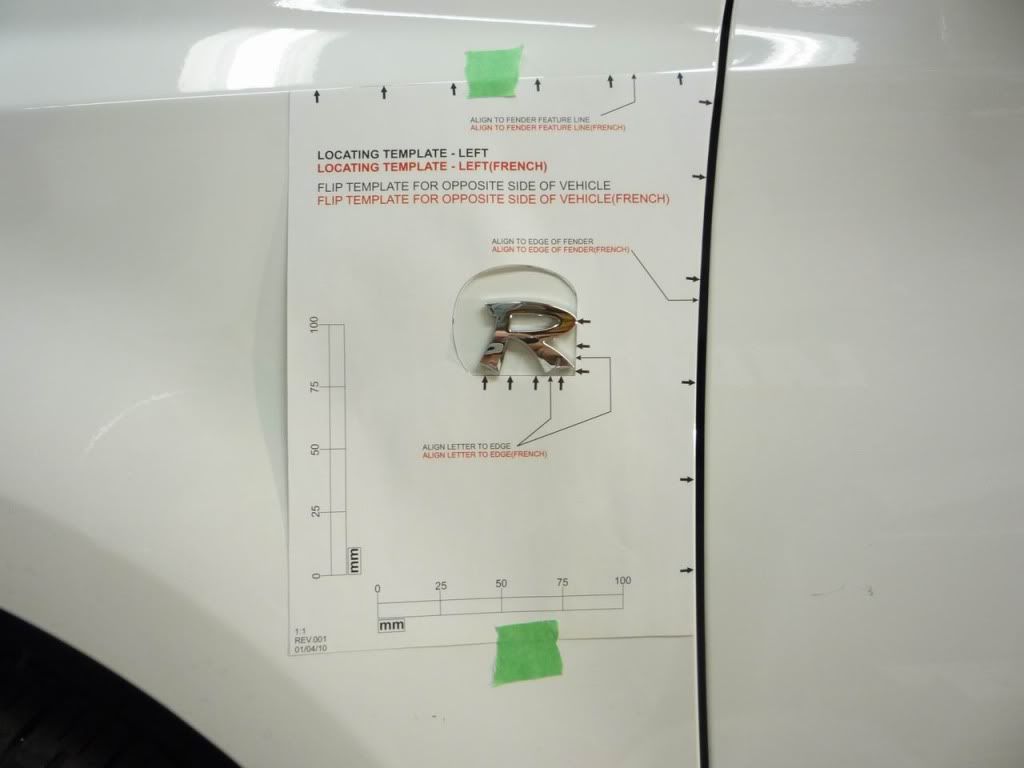
This image has been resized. Click this bar to view the full image.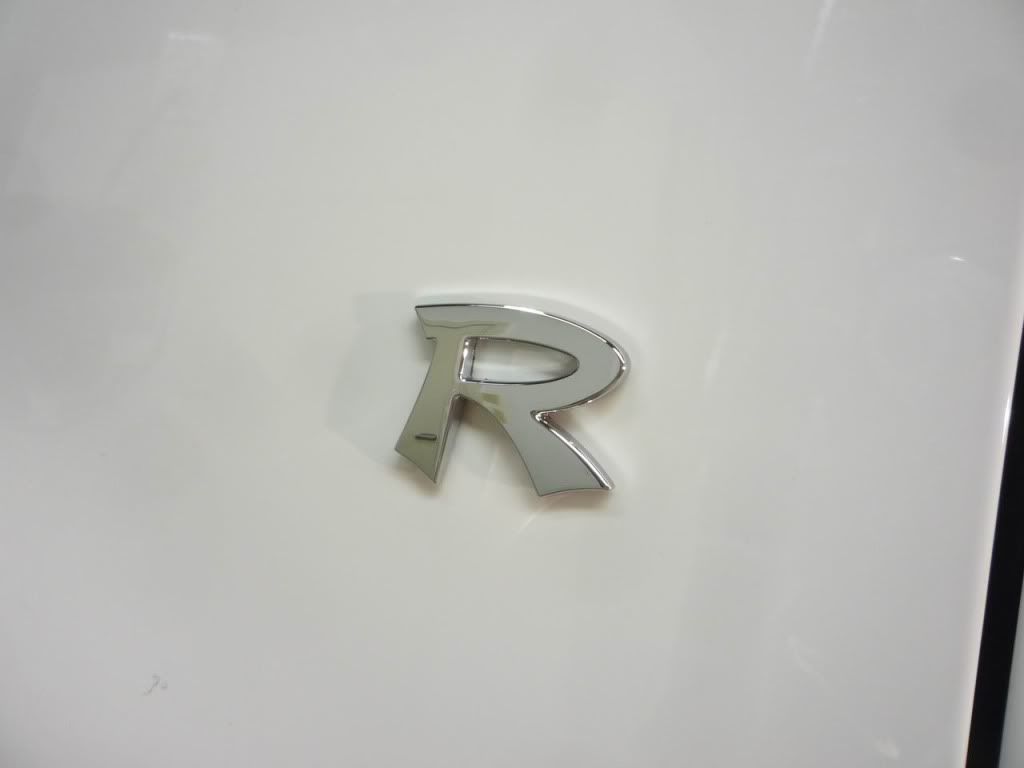
This image has been resized. Click this bar to view the full image.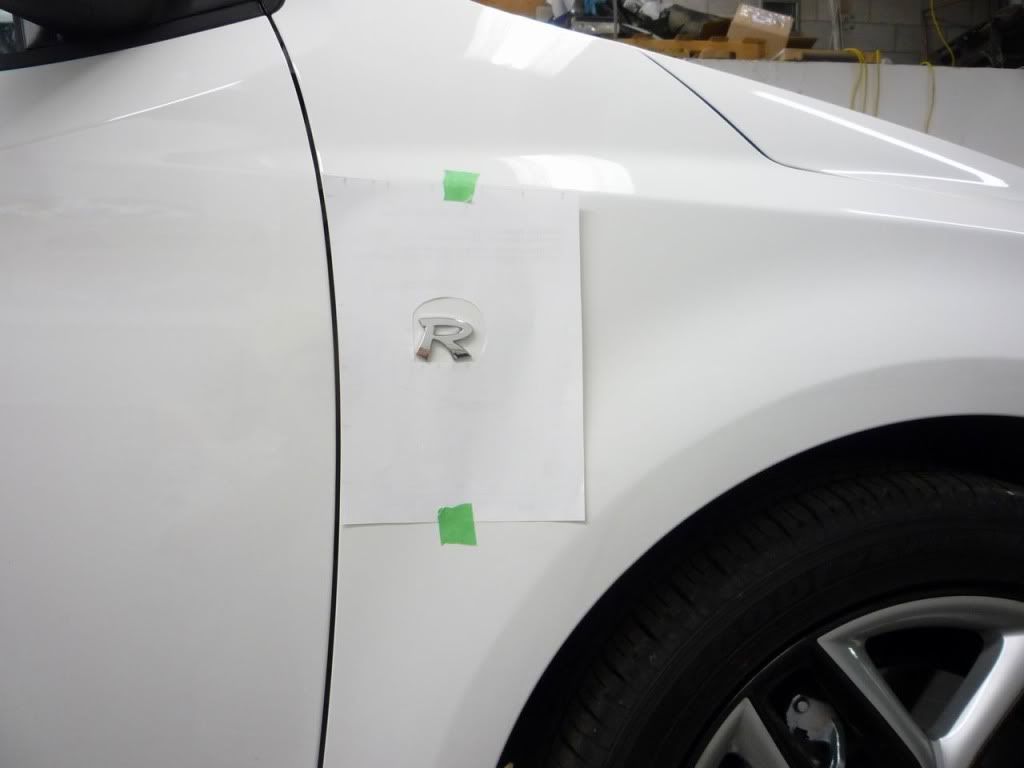

 رد مع اقتباس
المواضيع المتشابهه
-
فوانيس سيراتو جديده زى بتاعة البى ام ليدات .جميله جدا بالصور و الفيديو
بواسطة moha4tec في المنتدى كـــــيامشاركات: 19آخر مشاركة: 24-05-2014, 01:04 AM -
ما هو سعر كيا سيراتو كوبيه جديده فى السوق و مستعمله 2011
بواسطة moha4tec في المنتدى كـــــيامشاركات: 12آخر مشاركة: 25-01-2012, 10:15 PM -
بالصور عن باسات 2011-الجديدة كليا تقرير شامل
بواسطة احمدعبدالعزيز في المنتدى أخبار السيارات في مصر والعالممشاركات: 4آخر مشاركة: 08-02-2011, 06:41 AM -
تعديلات سيراتو 2011 بالفيديو من الوكيل بروكسى
بواسطة aaet1 في المنتدى كـــــيامشاركات: 18آخر مشاركة: 01-01-2011, 07:25 PM -
اوبل زافيرا جديده كليا 2011
بواسطة asd7778 في المنتدى أوبـــــلمشاركات: 13آخر مشاركة: 12-04-2010, 11:23 AM
الكلمات الدلالية لهذا الموضوع
 ضوابط المشاركة
Content Relevant URLs by vBSEO 3.6.0 PL2
المفضلات