

 رد مع اقتباس
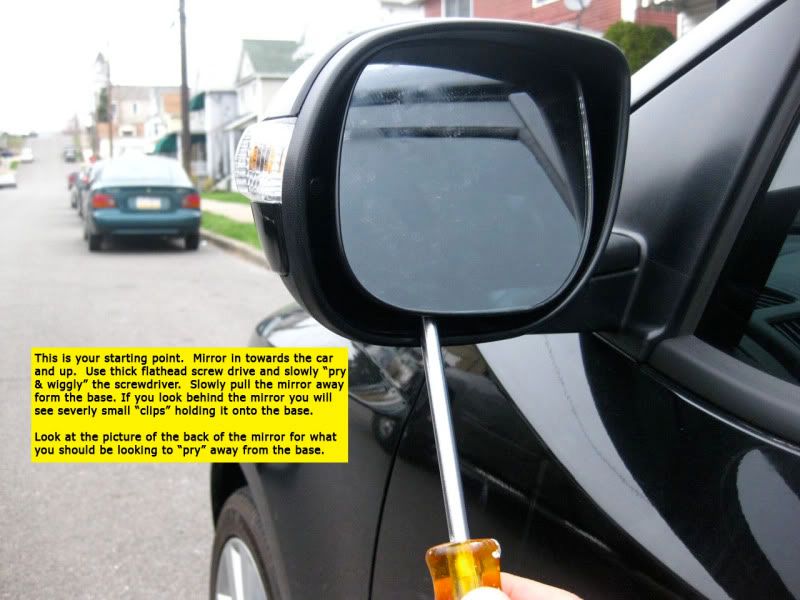
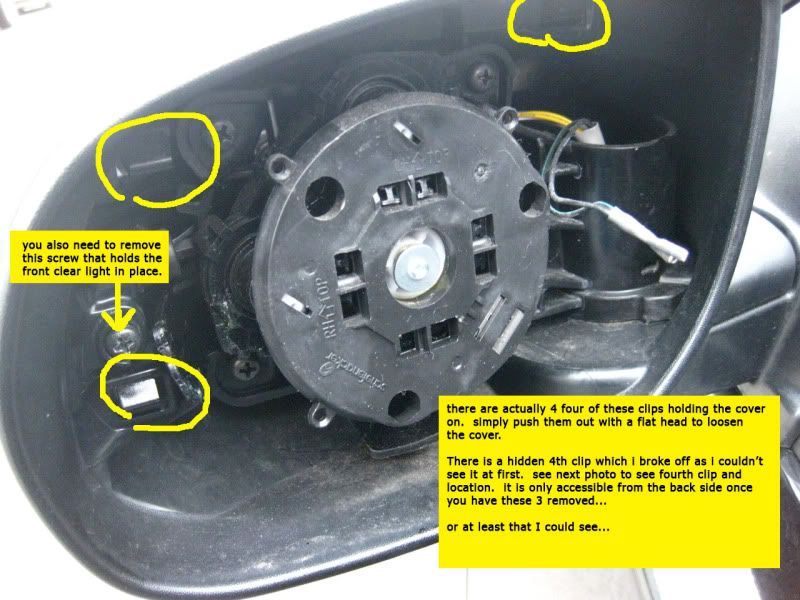
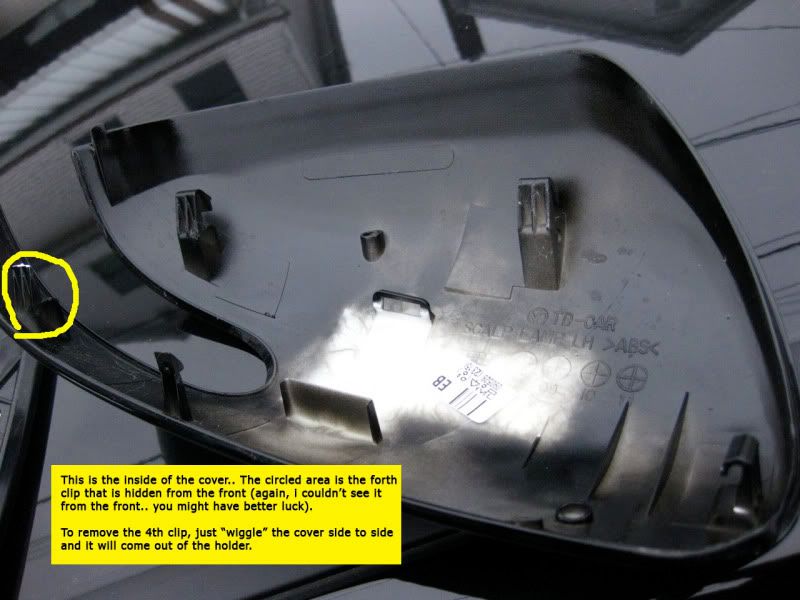
ازاى تغير نور الاشاره اللى فى مراية السيراتو سواء بلدات او لمبه عاديه من غير ما تكسر او تتبوظ حاجه
step 1.
This image has been resized. Click this bar to view the full image.
Step 2.
This image has been resized. Click this bar to view the full image.
Step 3
This image has been resized. Click this bar to view the full image.
Step 4
This image has been resized. Click this bar to view the full image.
Step 5
This image has been resized. Click this bar to view the full image.
Step 6
This image has been resized. Click this bar to view the full image.
Step 7
This image has been resized. Click this bar to view the full image.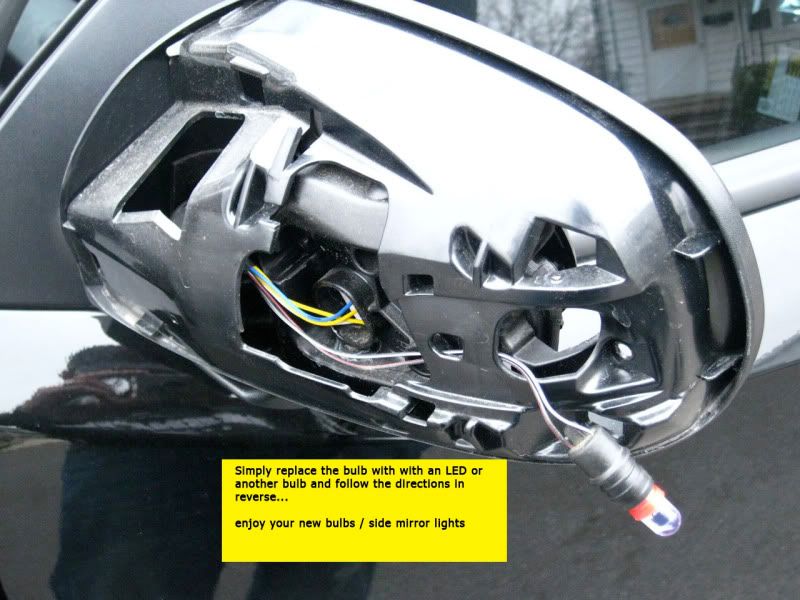
النتائج 171 إلى 180 من 452
-
LinkBack
 LinkBack URL
 About LinkBacks
- Bookmark & Share
- Tweet this thread
-

رقم العضوية : 58100
تاريخ التسجيل : 06Jan2010
المشاركات : 5,727
النوع : ذكر
الاقامة : السعوديه
السيارة: not yet
السيارة[2]: ..
دراجة بخارية: no
الحالة :

 -
hasad">
-
hasad">
This image has been resized. Click this bar to view the full image.
.
This image has been resized. Click this bar to view the full image.
-
رقم العضوية : 58100
تاريخ التسجيل : 06Jan2010
المشاركات : 5,727
النوع : ذكر
الاقامة : السعوديه
السيارة: not yet
السيارة[2]: ..
دراجة بخارية: no
الحالة :
-
-
رقم العضوية : 58100
تاريخ التسجيل : 06Jan2010
المشاركات : 5,727
النوع : ذكر
الاقامة : السعوديه
السيارة: not yet
السيارة[2]: ..
دراجة بخارية: no
الحالة :
-
اه يا جماعه يعنى مفيش ردود و مفيش تثبيت كمان
والله انا تعبت فى الموضوع ده جامد جدا و انا حبيت اكون من الناس اللى بتتفاعل مع المنتدى تفيد و تستفيد
ارجوا التثبيت حتى تعم الفائده
يعنى اروح ابيع كيداهم و الا اه يعنى
اريد حلا او تثبيتا (ربنا يخلى الاداره)
-
رقم العضوية : 58100
تاريخ التسجيل : 06Jan2010
المشاركات : 5,727
النوع : ذكر
الاقامة : السعوديه
السيارة: not yet
السيارة[2]: ..
دراجة بخارية: no
الحالة :
-
This image has been resized. Click this bar to view the full image.
This image has been resized. Click this bar to view the full image.
-
رقم العضوية : 58100
تاريخ التسجيل : 06Jan2010
المشاركات : 5,727
النوع : ذكر
الاقامة : السعوديه
السيارة: not yet
السيارة[2]: ..
دراجة بخارية: no
الحالة :
-

Alright finally done mine too .
here's pic from S'pore ..
Special thanks to the67beast for sending e pinstrip over .
Cerato Forte 1.6 (M/T)
This image has been resized. Click this bar to view the full image.
-
رقم العضوية : 58100
تاريخ التسجيل : 06Jan2010
المشاركات : 5,727
النوع : ذكر
الاقامة : السعوديه
السيارة: not yet
السيارة[2]: ..
دراجة بخارية: no
الحالة :
-

This image has been resized. Click this bar to view the full image.
This image has been resized. Click this bar to view the full image.

-
رقم العضوية : 58100
تاريخ التسجيل : 06Jan2010
المشاركات : 5,727
النوع : ذكر
الاقامة : السعوديه
السيارة: not yet
السيارة[2]: ..
دراجة بخارية: no
الحالة :
-


-
رقم العضوية : 58100
تاريخ التسجيل : 06Jan2010
المشاركات : 5,727
النوع : ذكر
الاقامة : السعوديه
السيارة: not yet
السيارة[2]: ..
دراجة بخارية: no
الحالة :
-
Front skirt installation complete
This image has been resized. Click this bar to view the full image.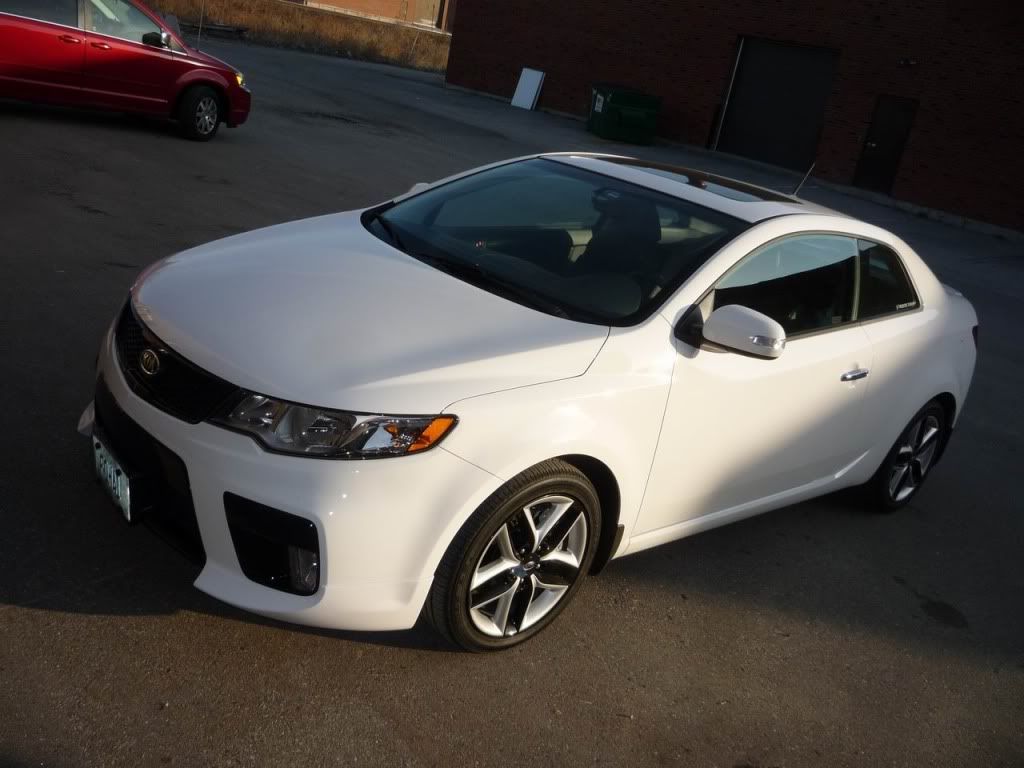
R side skirt
Here I was setting up for the side skirts.
I precut some painters tape to help hold on the part to the rocker to define its position.
Tip: use the foam sheet and place it below the car incase the part at the opposite end slips and falls to the ground. It’ll prevent any touch-ups.
This image has been resized. Click this bar to view the full image.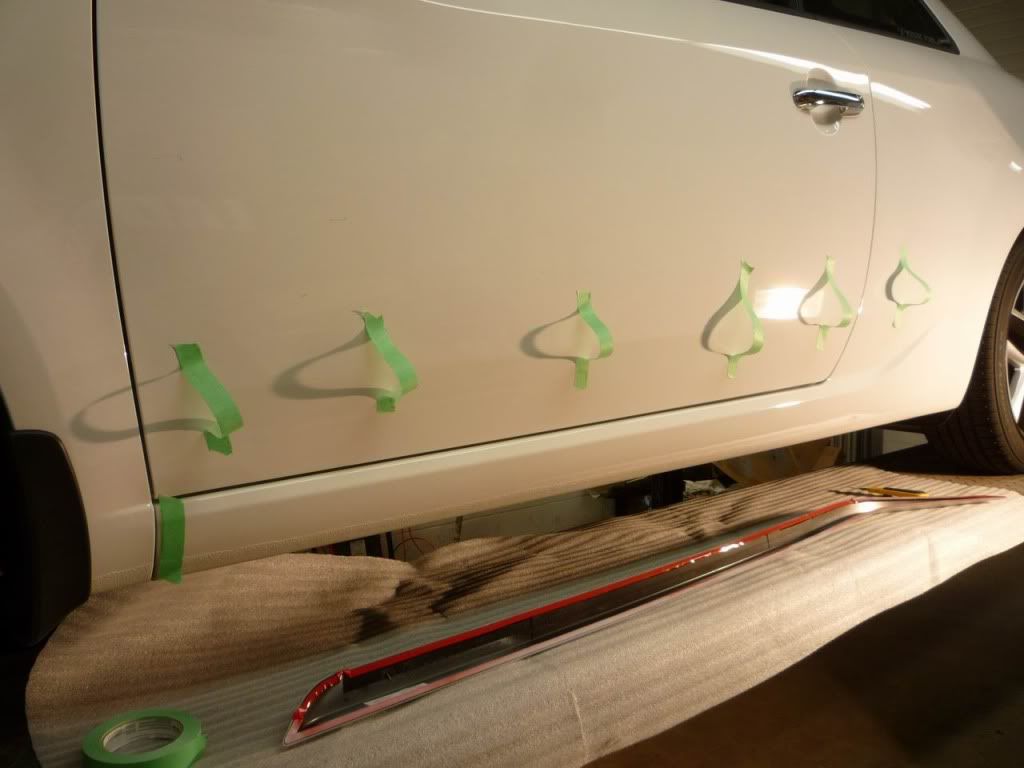
The 1” side tape is perfect to defining the position of the front edge
This image has been resized. Click this bar to view the full image.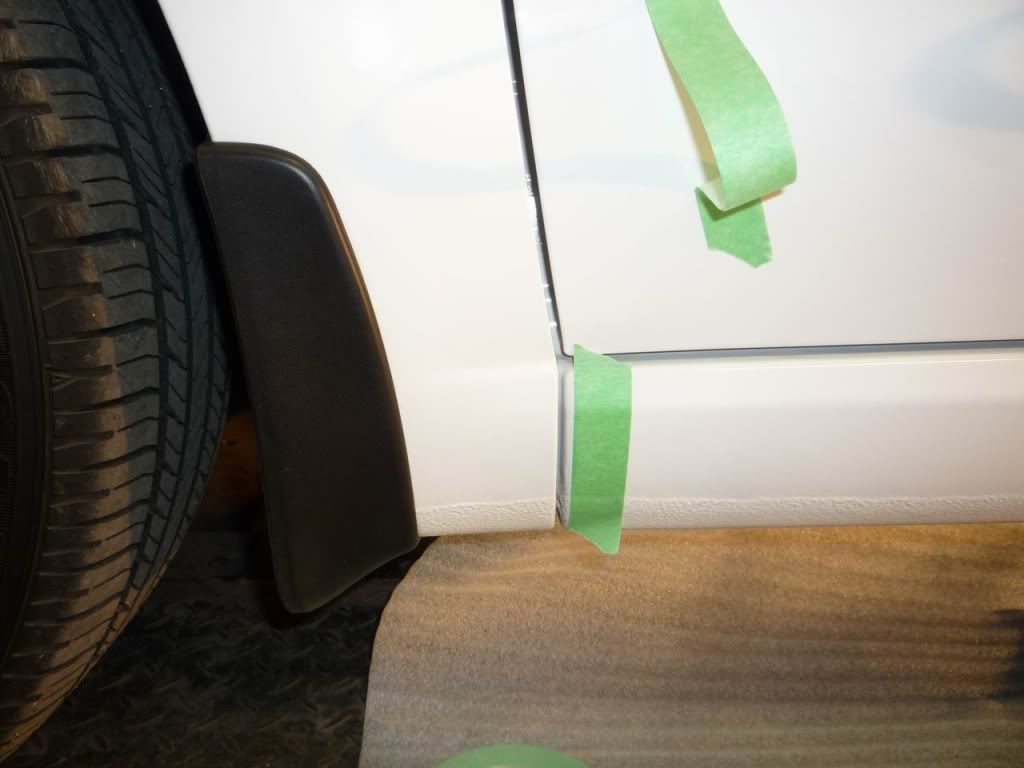
Side skirt installation complete
This image has been resized. Click this bar to view the full image.
This image has been resized. Click this bar to view the full image.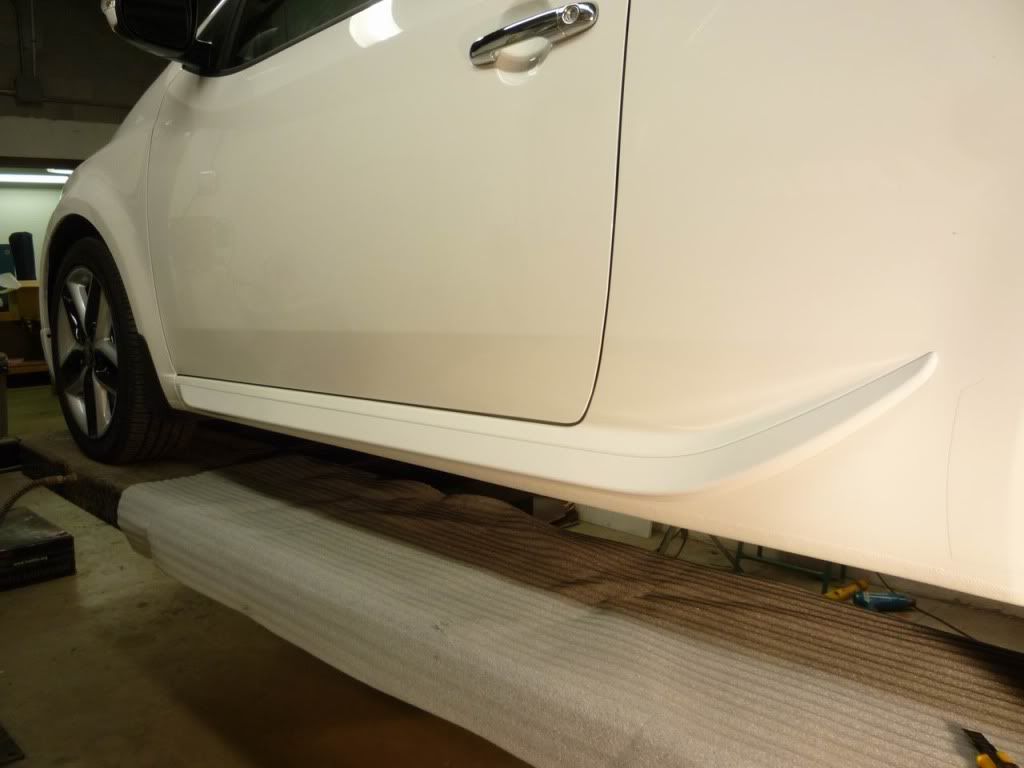
This image has been resized. Click this bar to view the full image.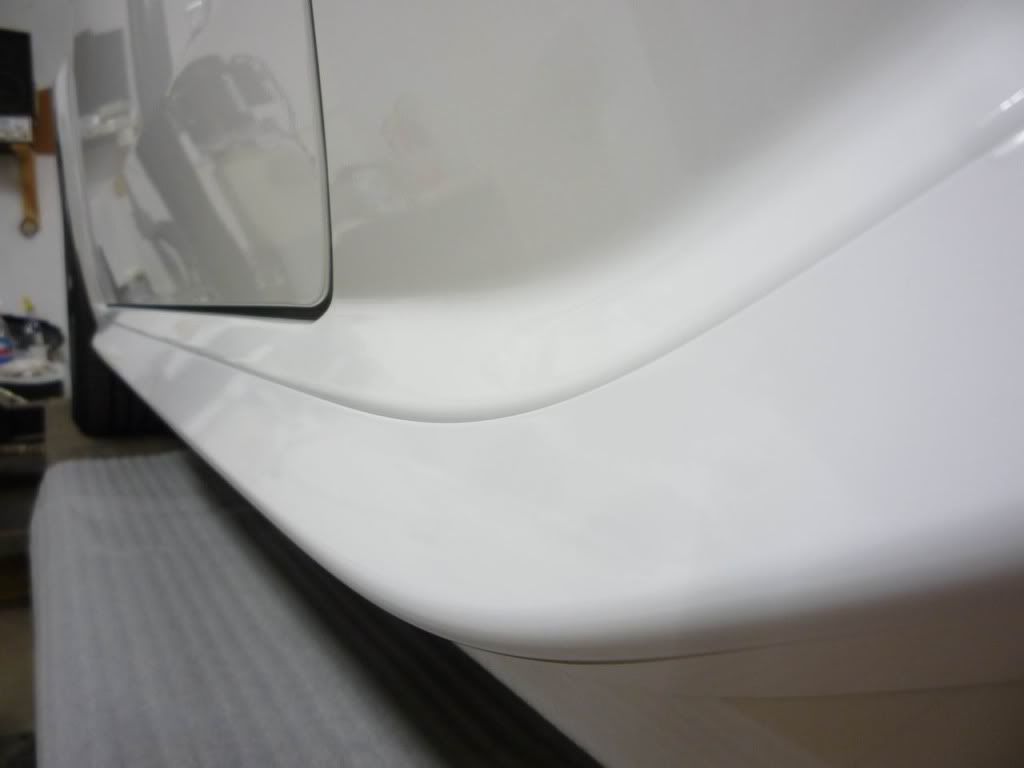
R rear lip style spoiler
Here’s the spoiler after painting
This image has been resized. Click this bar to view the full image.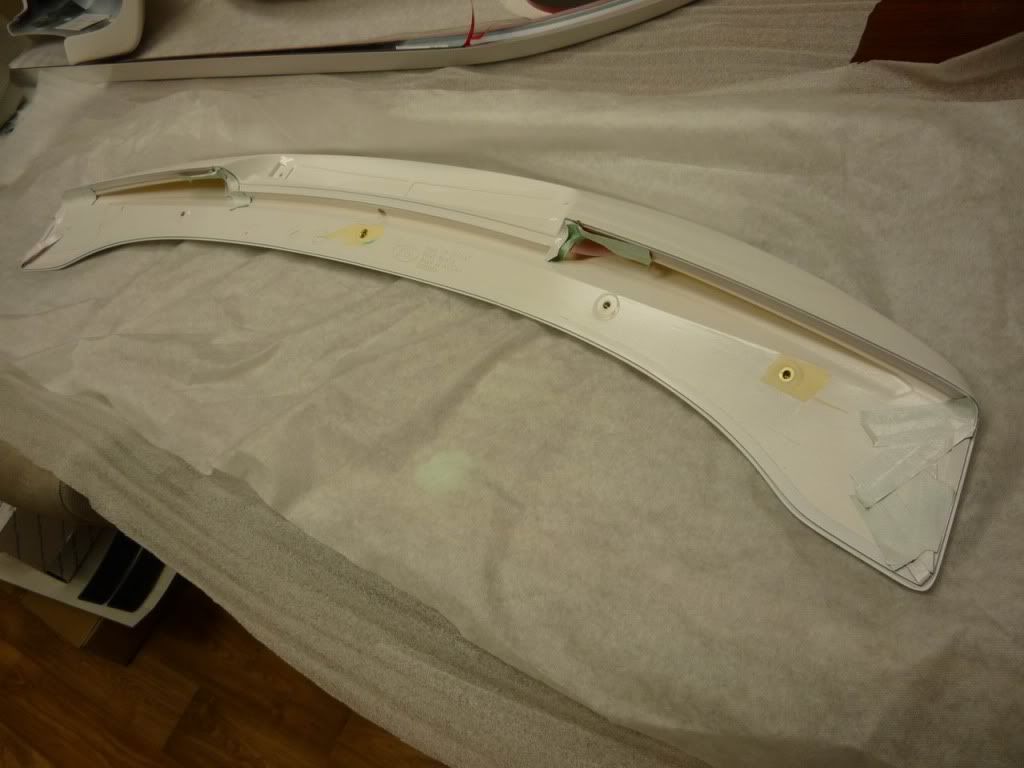
The black strips on stuck on the deck lid are called drill guides. They have a stem which slips into the 5 mounting positions of the spoiler and help transfer those locations onto the deck lid. The green painters tape was used to provide me with the center position I found when I first placed the spoiler on the deck lid.
This image has been resized. Click this bar to view the full image.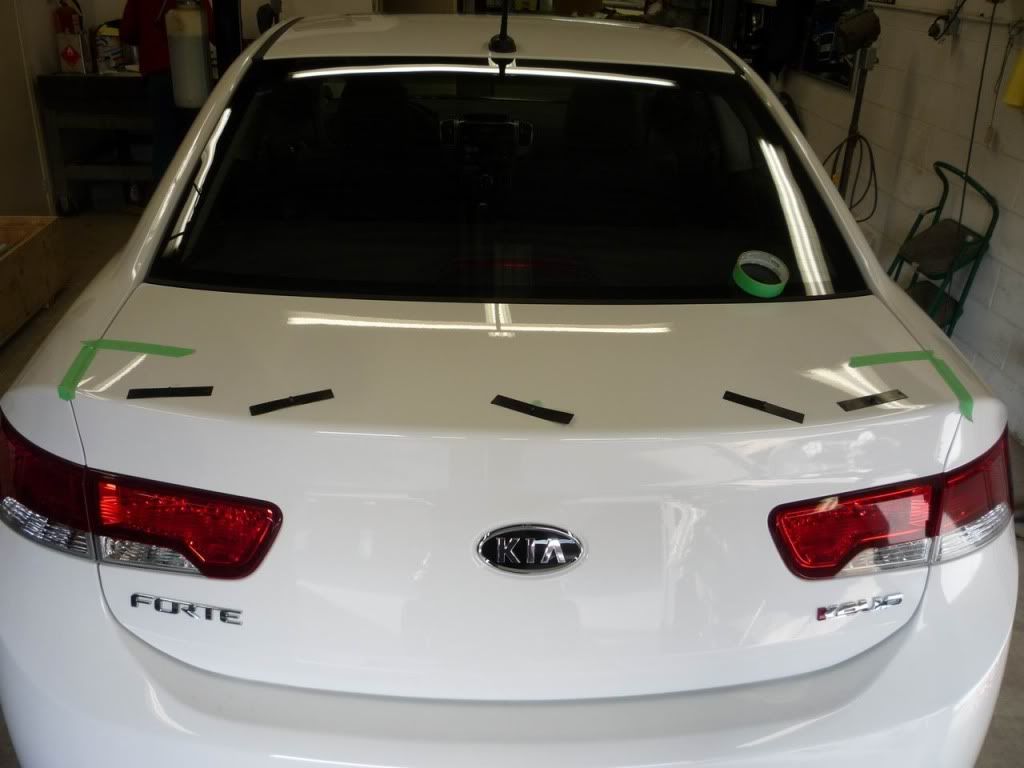
I mounted the brake light to the spoiler. NOTE: the R spoilers will include a Hella brake light with a RED lens. I used a Hella light with a clear lens (lights up red) from an old project which I wanted to try out.
This image has been resized. Click this bar to view the full image.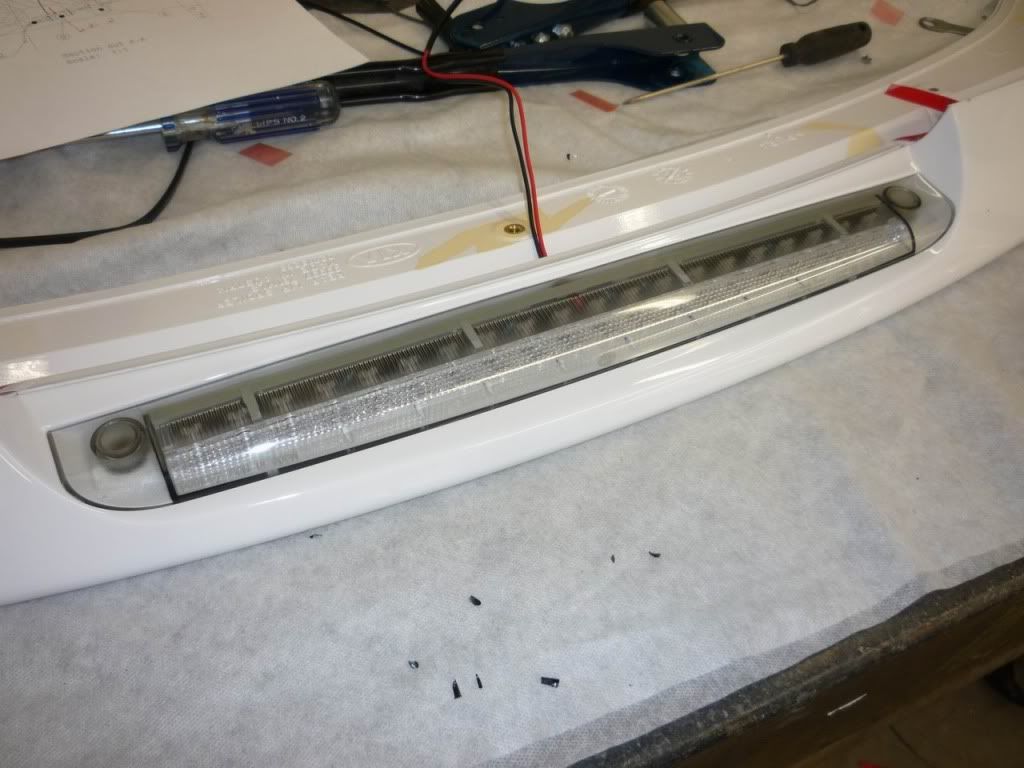
These show the connection to the center stop light located below the rear parcel ....f. We also included some foam pads to wrap the wires in a couple of location to avoid any potential damage.
This image has been resized. Click this bar to view the full image.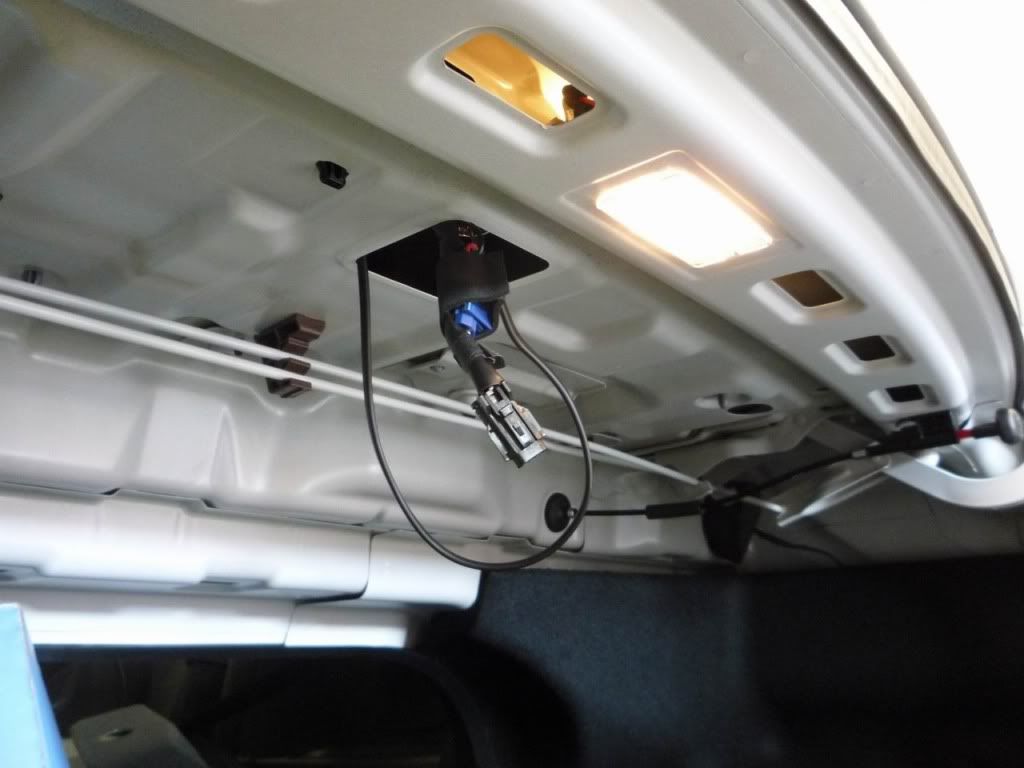
This image has been resized. Click this bar to view the full image.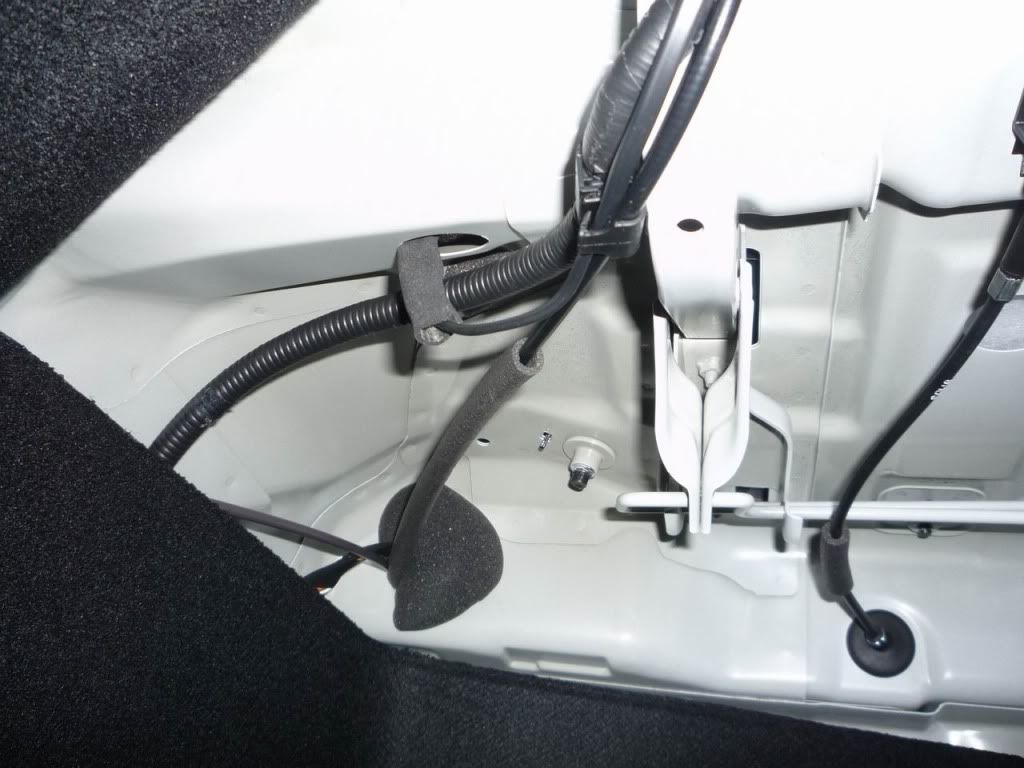
Rear spoiler installation complete
This image has been resized. Click this bar to view the full image.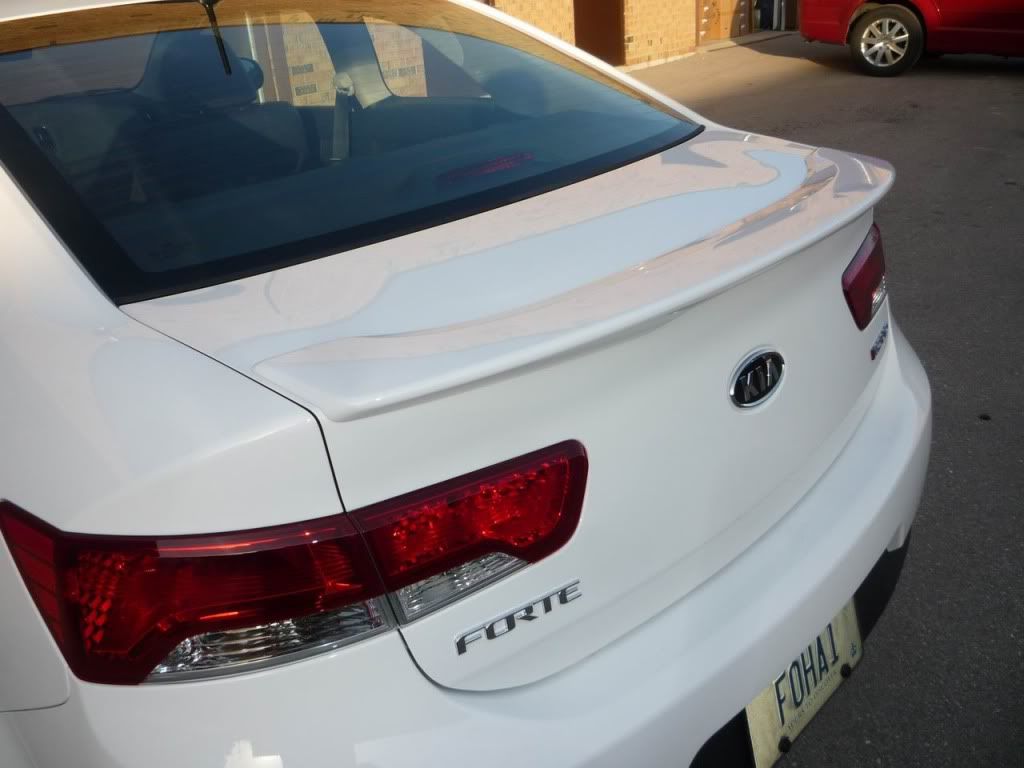
This image has been resized. Click this bar to view the full image.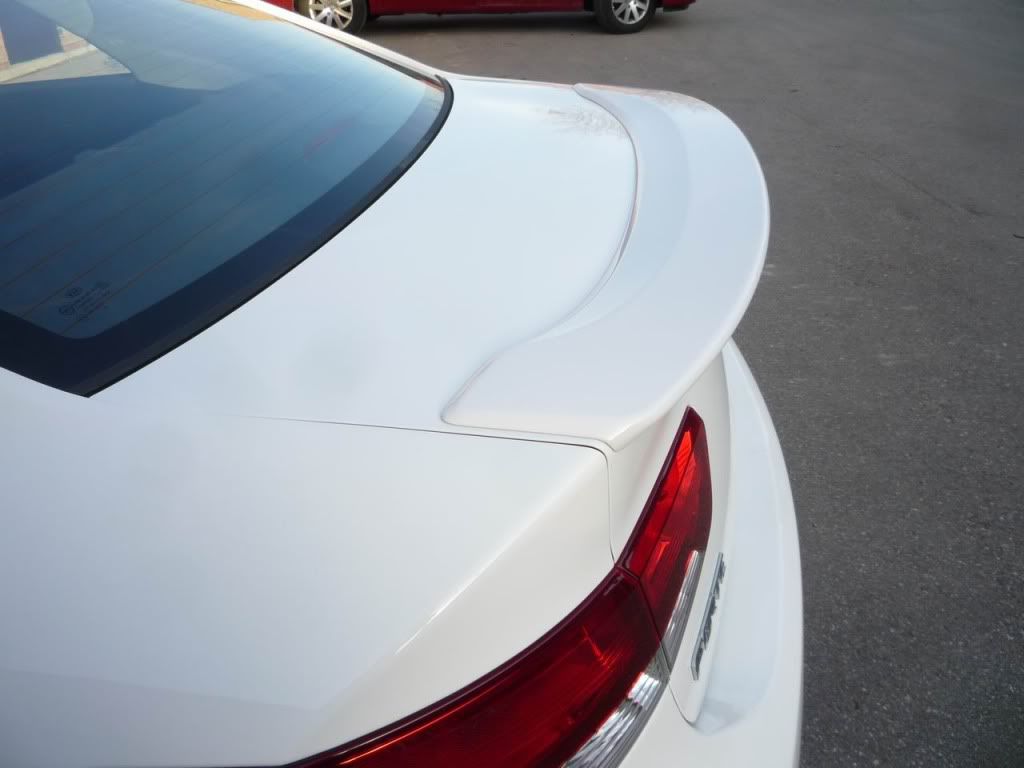
This image has been resized. Click this bar to view the full image.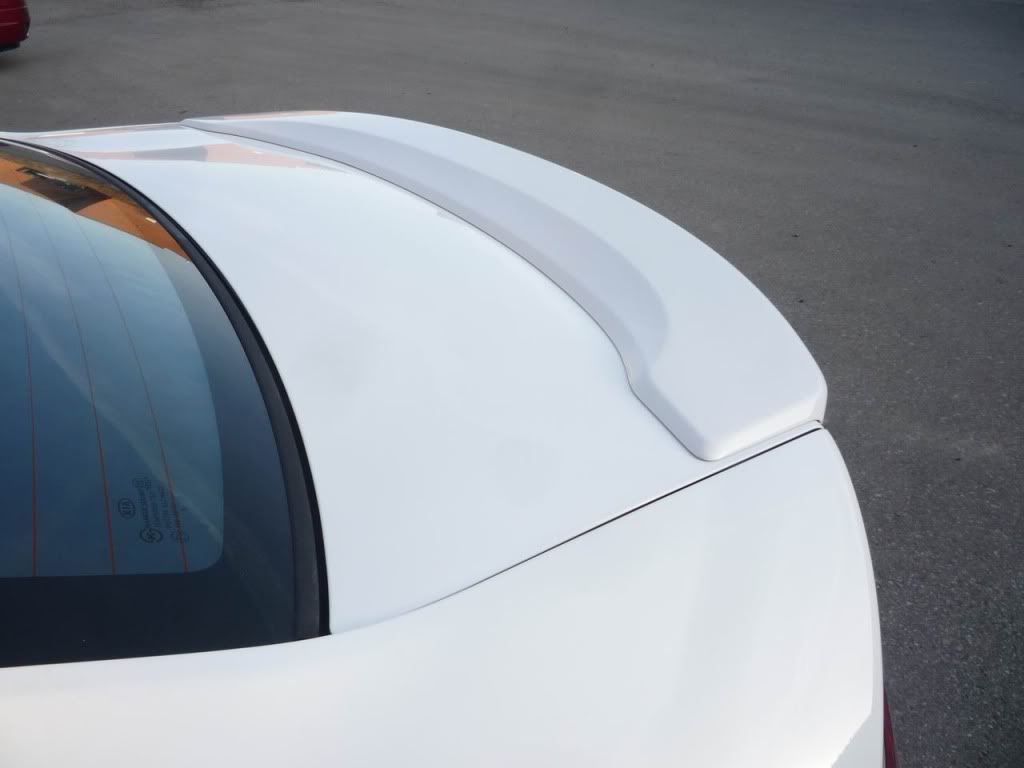
This image has been resized. Click this bar to view the full image.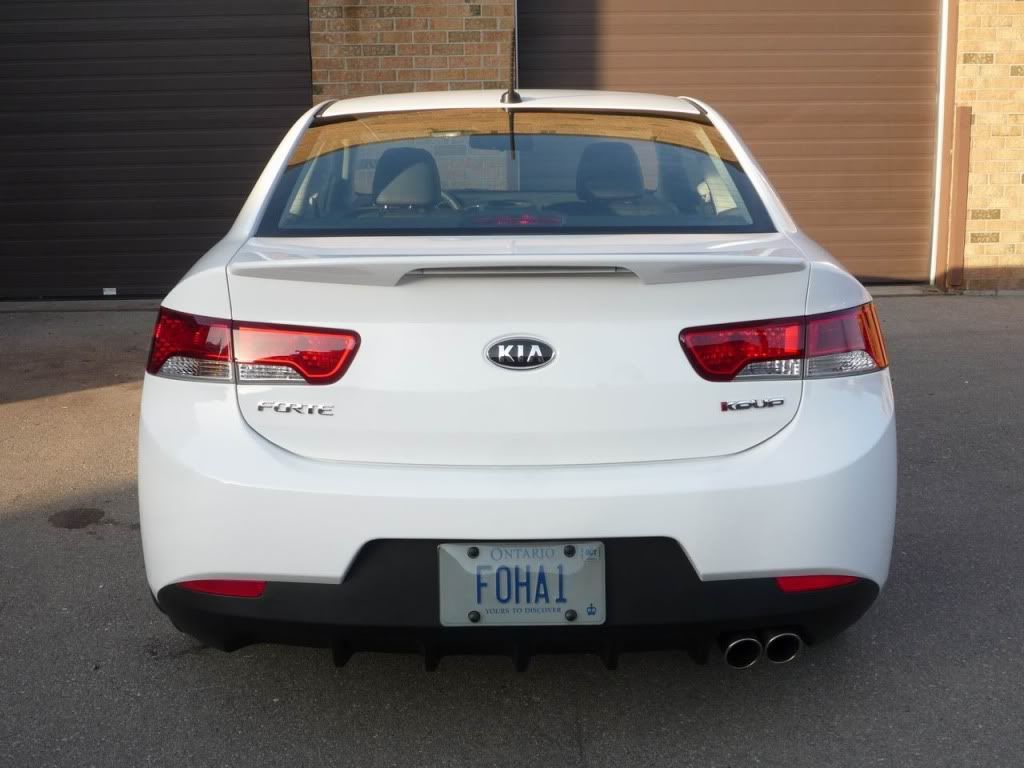
Here’s a side view but I didn’t have the side skirts installed yet.
This image has been resized. Click this bar to view the full image.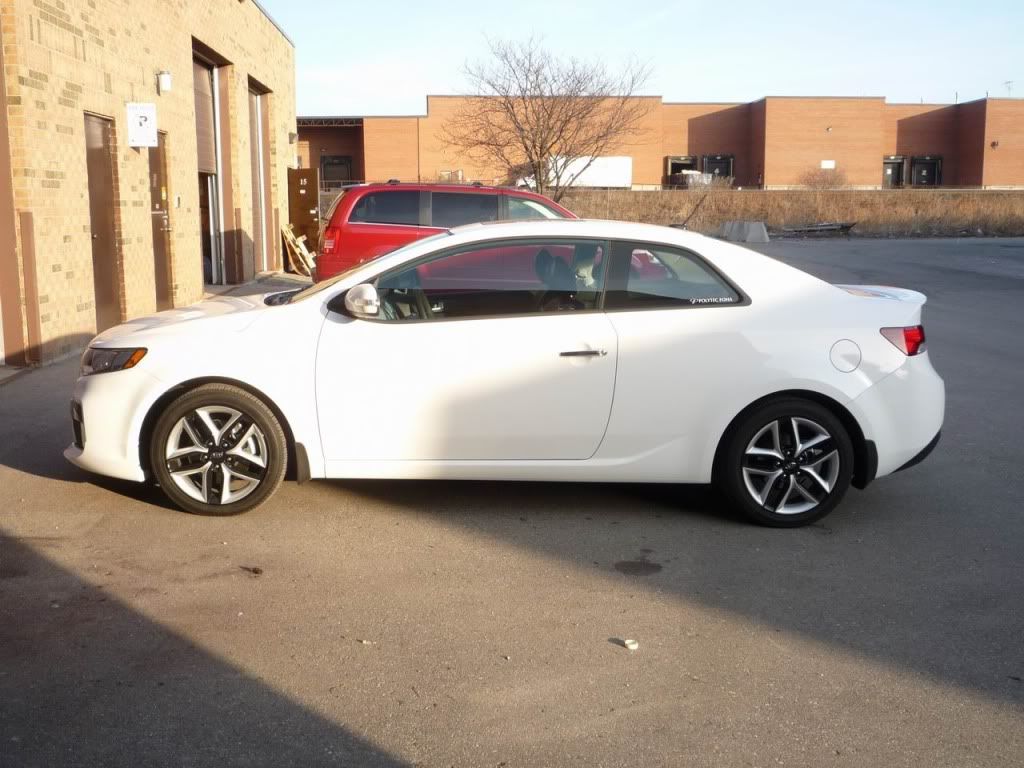
R door sill plates
I used a couple of strips of tape on either side of the original black door sill plate so I know where to place the new R sill plate.
I removed the original black plastic door sill plate using a plastic clip removal tool.
Tip: along the edge, I placed a rag underneath the tool to avoid scuffing the painted surface.
This image has been resized. Click this bar to view the full image.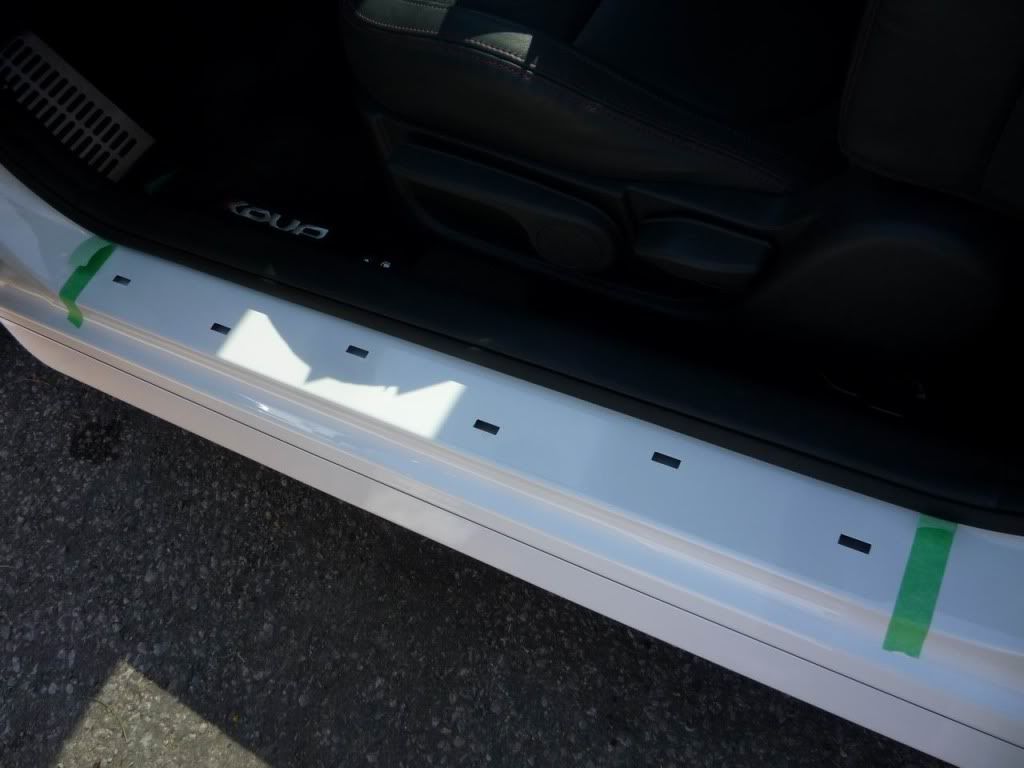
This image has been resized. Click this bar to view the full image.
Door sill installation complete
This image has been resized. Click this bar to view the full image.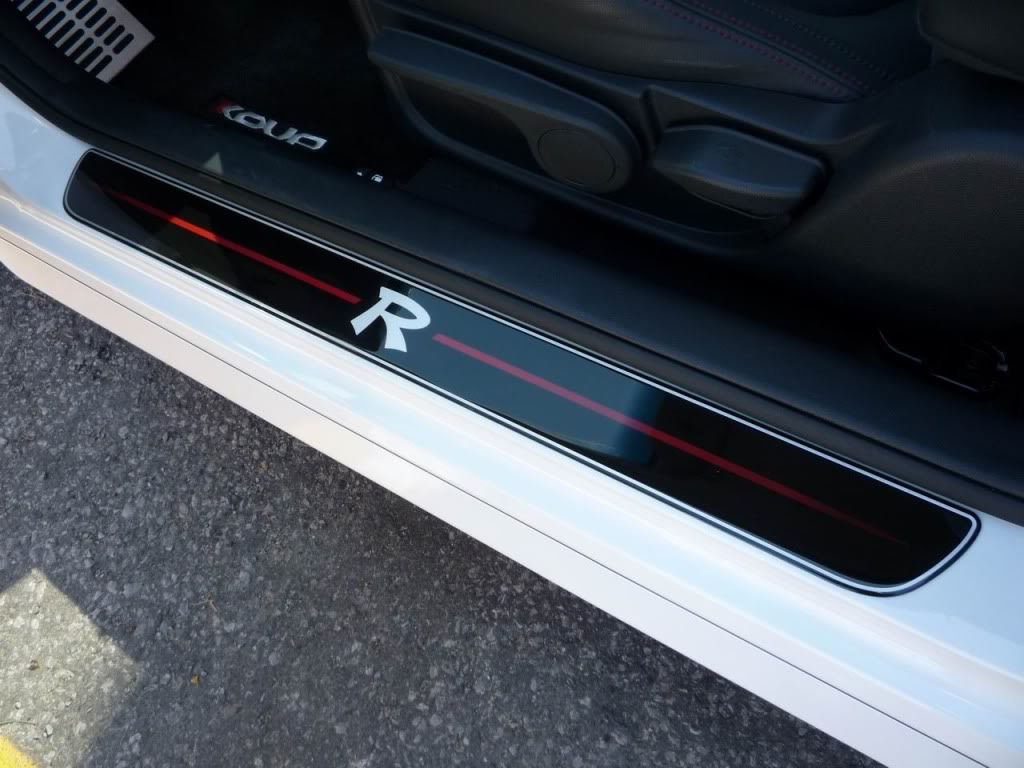
R Badge
I cut the template and held it up to the fender to understand where I need to prep.
I then proceeded to clean the surface and taped the template in place. The template can then be used on the opposite side of the vehicle by simply flipping the template around.
This image has been resized. Click this bar to view the full image.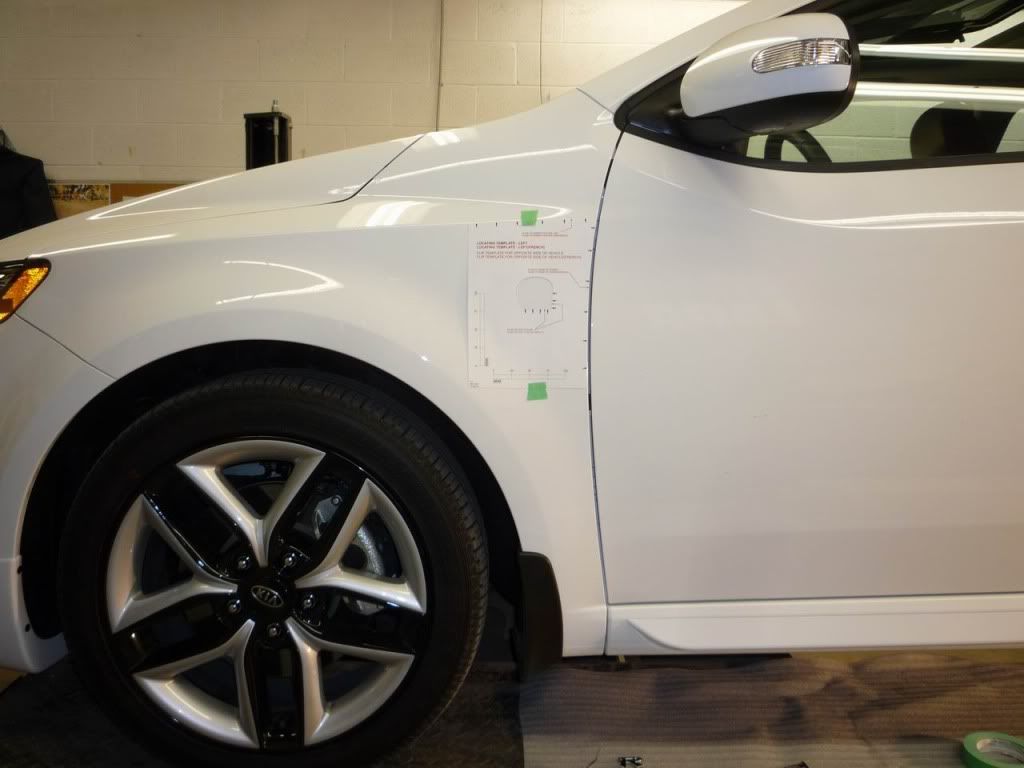
This image has been resized. Click this bar to view the full image.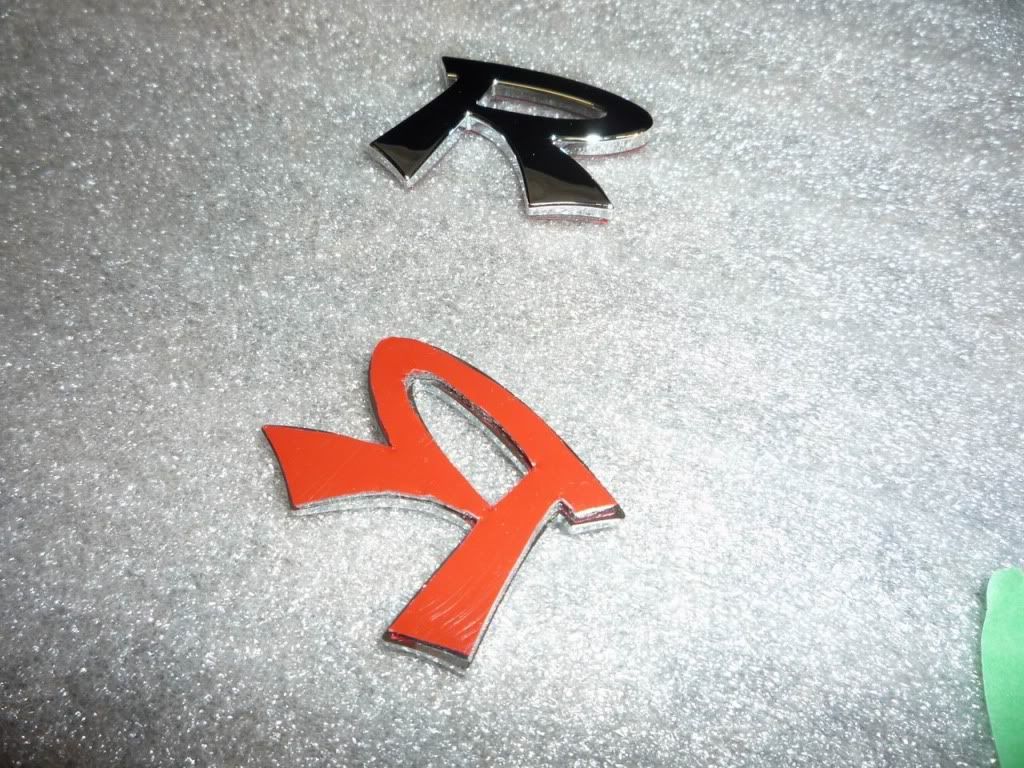
This image has been resized. Click this bar to view the full image.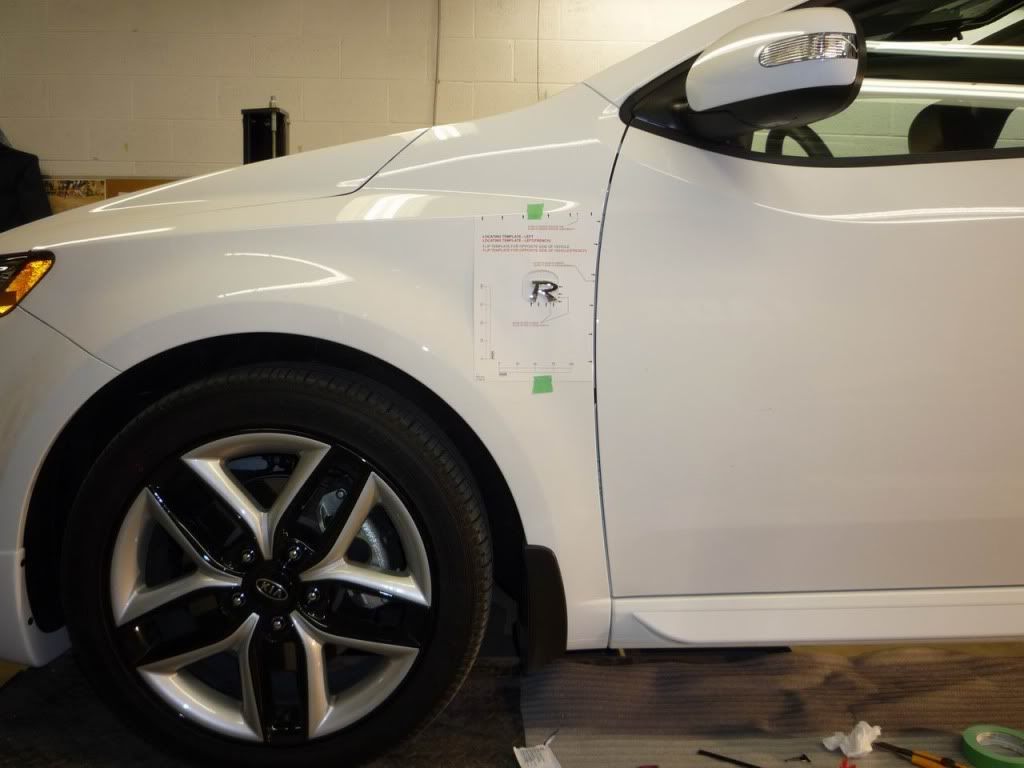
This image has been resized. Click this bar to view the full image.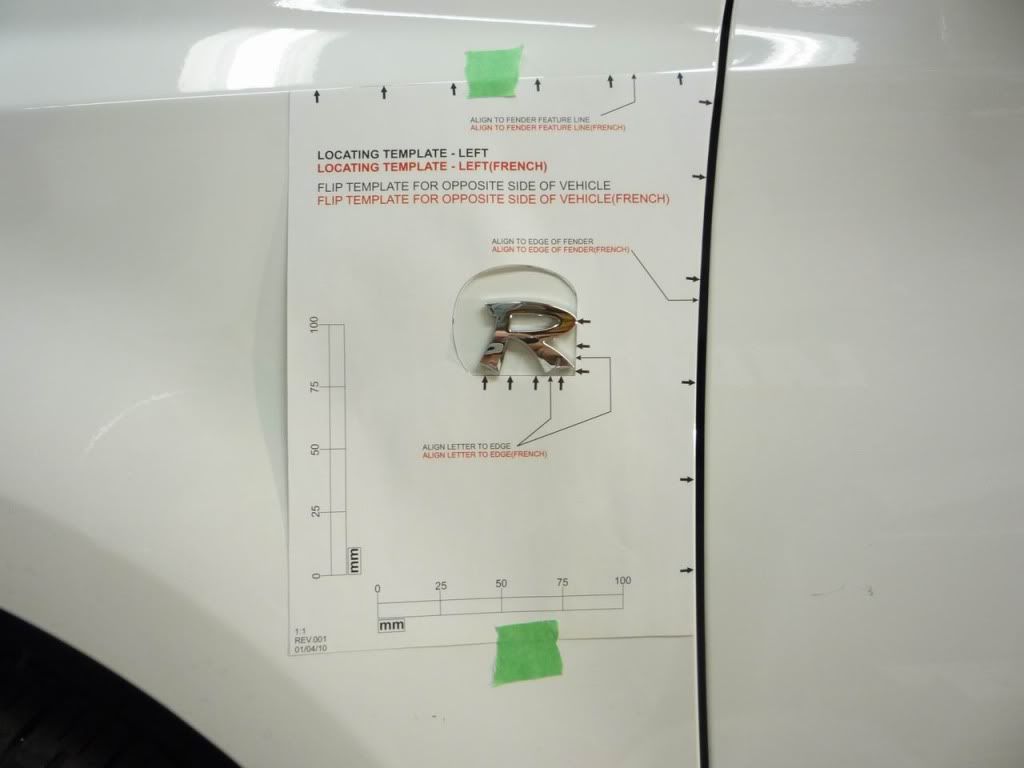
This image has been resized. Click this bar to view the full image.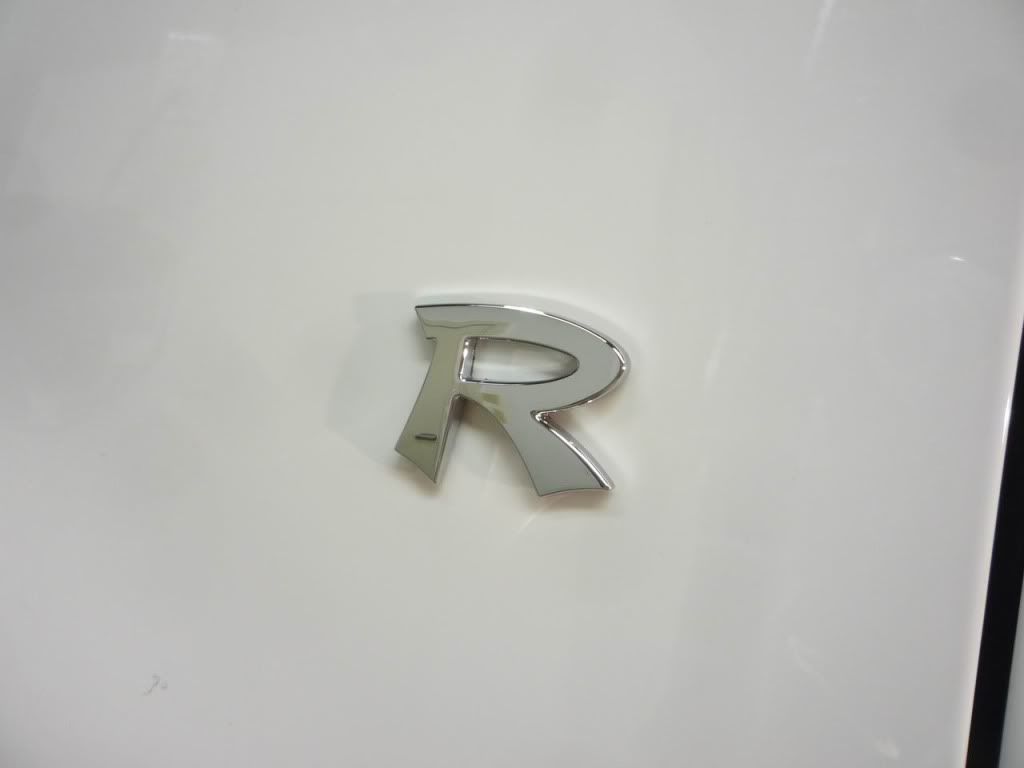
This image has been resized. Click this bar to view the full image.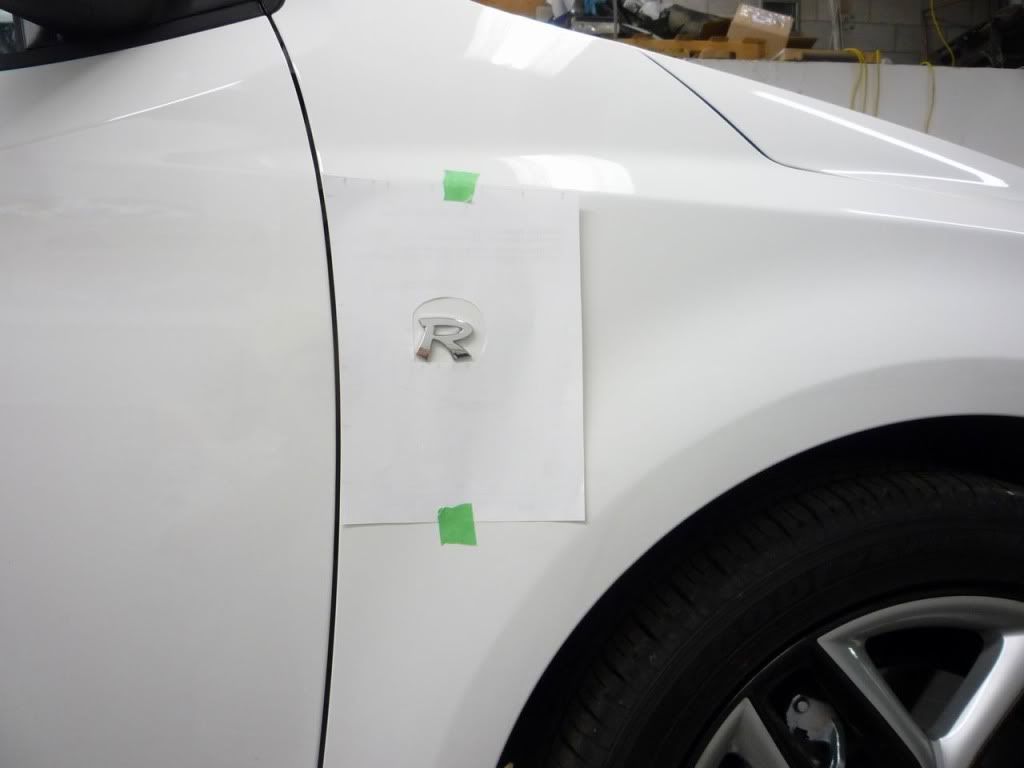
-
رقم العضوية : 58100
تاريخ التسجيل : 06Jan2010
المشاركات : 5,727
النوع : ذكر
الاقامة : السعوديه
السيارة: not yet
السيارة[2]: ..
دراجة بخارية: no
الحالة :
-
This image has been resized. Click this bar to view the full image.
This image has been resized. Click this bar to view the full image.
This image has been resized. Click this bar to view the full image.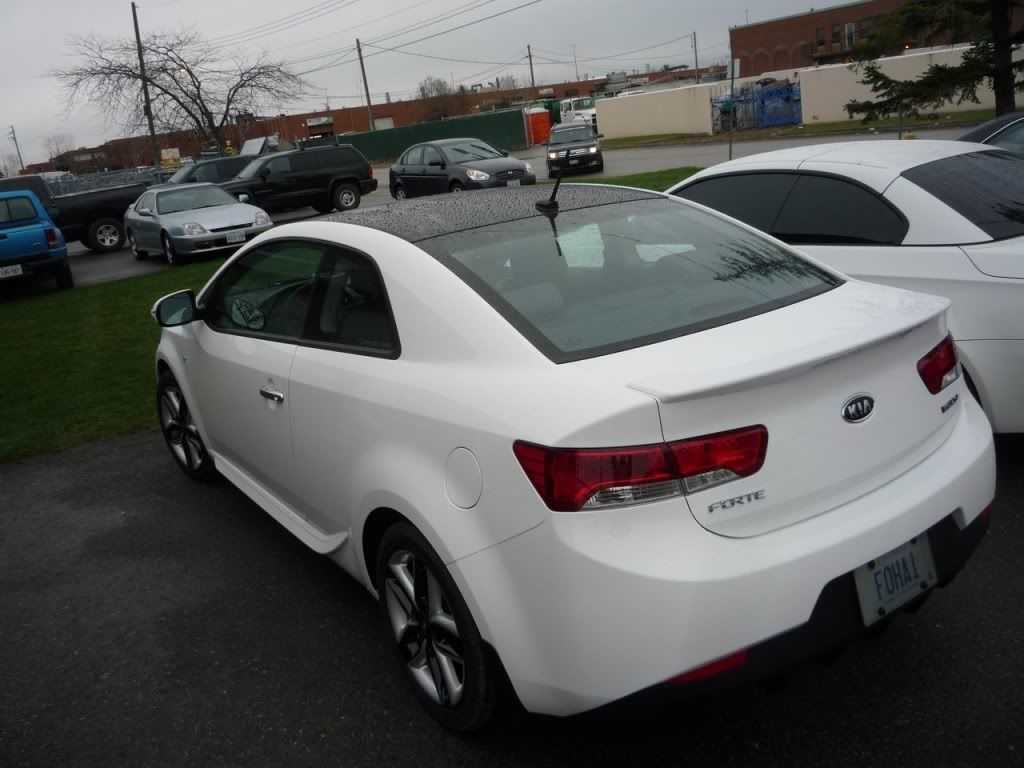
-
رقم العضوية : 58100
تاريخ التسجيل : 06Jan2010
المشاركات : 5,727
النوع : ذكر
الاقامة : السعوديه
السيارة: not yet
السيارة[2]: ..
دراجة بخارية: no
الحالة :
-
hasad">تركيب زينون بالشرح و الصور
HID install
Having experienced HID lighting in all my cars for over 5 years, it was difficult to go back to regular halogen lighting. I drive a fair amount on the highway from Toronto to many parts of Michigan. Being able to spot any animals along the side of the highway at 4-5am is very important for me.
I chose to use AbsoluteHID due to the positive feedback I received from the local BMW community over the past years and the fact that I have local support is a plus.
I used an H11 AbsoluteHID kit. It uses 55W ballasts with 4300K bulbs. I wanted to achieve a stock appearance without any shade of blue.
It’s also recommended that you upgrade your 10amp headlight fuse with a 15amp fuse which I had no problem with.
Before removing the headlamp assemblies, I added some painters tape to the front bumper and grille below the lights to prevent any potential damage.
This image has been resized. Click this bar to view the full image.
Test fitting all the connections and plugged everything in the car.
This image has been resized. Click this bar to view the full image.
I used a 1” hole saw and made a hole onto the cover as shown
This image has been resized. Click this bar to view the full image.
I ran the wires through and used black caulking on the grommet to help seal the grommet once in-place
This image has been resized. Click this bar to view the full image.
This image has been resized. Click this bar to view the full image.
I added a few strips of double sided tape and adhered the ballasts to the top of the windshield washer reservoir and the body as shown.
This image has been resized. Click this bar to view the full image.
This image has been resized. Click this bar to view the full image.
This image has been resized. Click this bar to view the full image.
This image has been resized. Click this bar to view the full image.
The lighting is incredible. The cut-off is actually quite low for a headlamp assembly that’s not designed for HID lighting output.
This image has been resized. Click this bar to view the full image.


المواضيع المتشابهه
-
فوانيس سيراتو جديده زى بتاعة البى ام ليدات .جميله جدا بالصور و الفيديو
بواسطة moha4tec في المنتدى كـــــيامشاركات: 19آخر مشاركة: 24-05-2014, 01:04 AM -
ما هو سعر كيا سيراتو كوبيه جديده فى السوق و مستعمله 2011
بواسطة moha4tec في المنتدى كـــــيامشاركات: 12آخر مشاركة: 25-01-2012, 10:15 PM -
بالصور عن باسات 2011-الجديدة كليا تقرير شامل
بواسطة احمدعبدالعزيز في المنتدى أخبار السيارات في مصر والعالممشاركات: 4آخر مشاركة: 08-02-2011, 06:41 AM -
تعديلات سيراتو 2011 بالفيديو من الوكيل بروكسى
بواسطة aaet1 في المنتدى كـــــيامشاركات: 18آخر مشاركة: 01-01-2011, 07:25 PM -
اوبل زافيرا جديده كليا 2011
بواسطة asd7778 في المنتدى أوبـــــلمشاركات: 13آخر مشاركة: 12-04-2010, 11:23 AM
الكلمات الدلالية لهذا الموضوع
 ضوابط المشاركة
Content Relevant URLs by vBSEO 3.6.0 PL2
المفضلات